Open post

How to Achieve The Perfect “Fresh-Faced” Spring Look

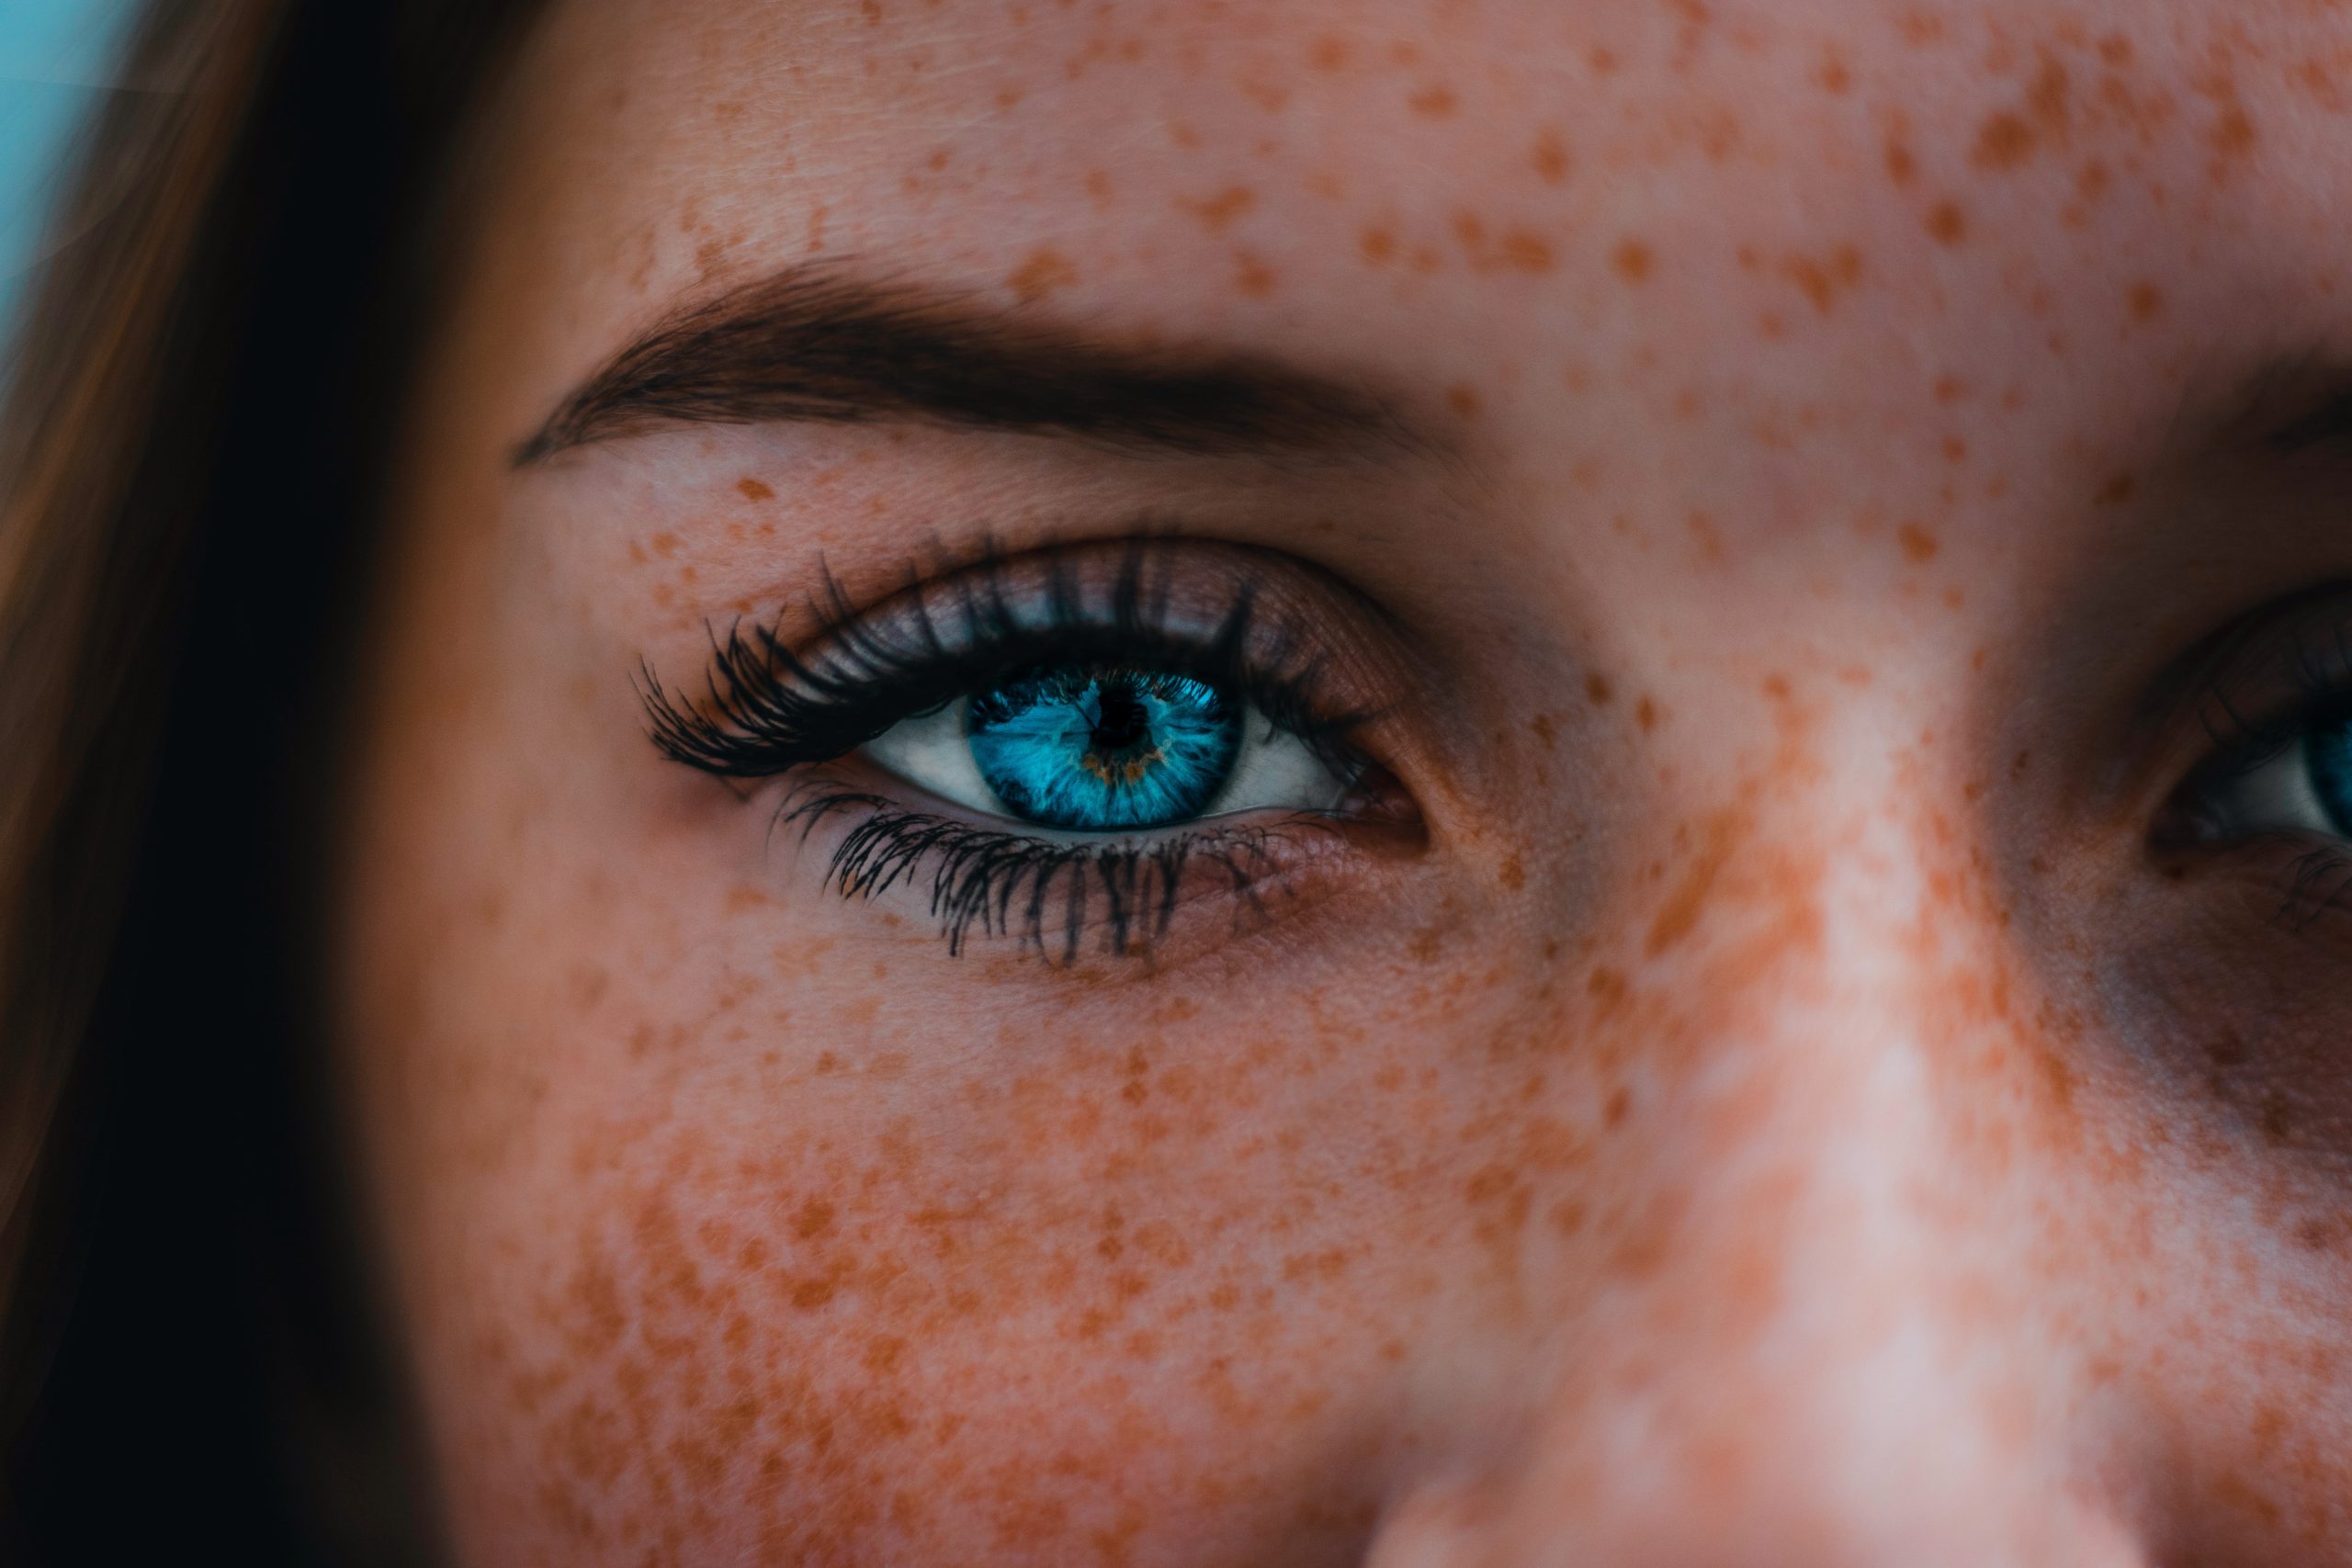
Hey beauty pros and business owners, are you ready to create a fresh-faced Spring look that’s all about natural, healthy-looking skin? Then you’ve come to the right place. In this post, we’ll be sharing our top tips for achieving a beautiful complexion that appears free of any makeup using Colorlab Cosmetics’ custom blend systems.

The “fresh-faced” beauty trend is all the rage this season and for a good reason. This look is about enhancing natural beauty with minimal makeup and focusing on healthy, radiant skin. And with Colorlab’s custom blend systems, you can customize your skincare and makeup routine to create the perfect tinted moisturizer and bronzer formula for your unique skin tone and preferences.

In this post, we’ll discuss the basics of the trend, how to create a flawless complexion, and how to customize your skincare and makeup routine with Colorlab’s products. So whether you’re a seasoned beauty pro or a budding entrepreneur, we’ve got you covered. Get ready to create a beautiful Spring look that’s all about fresh, glowing skin!
The Fresh-Faced Beauty Trend

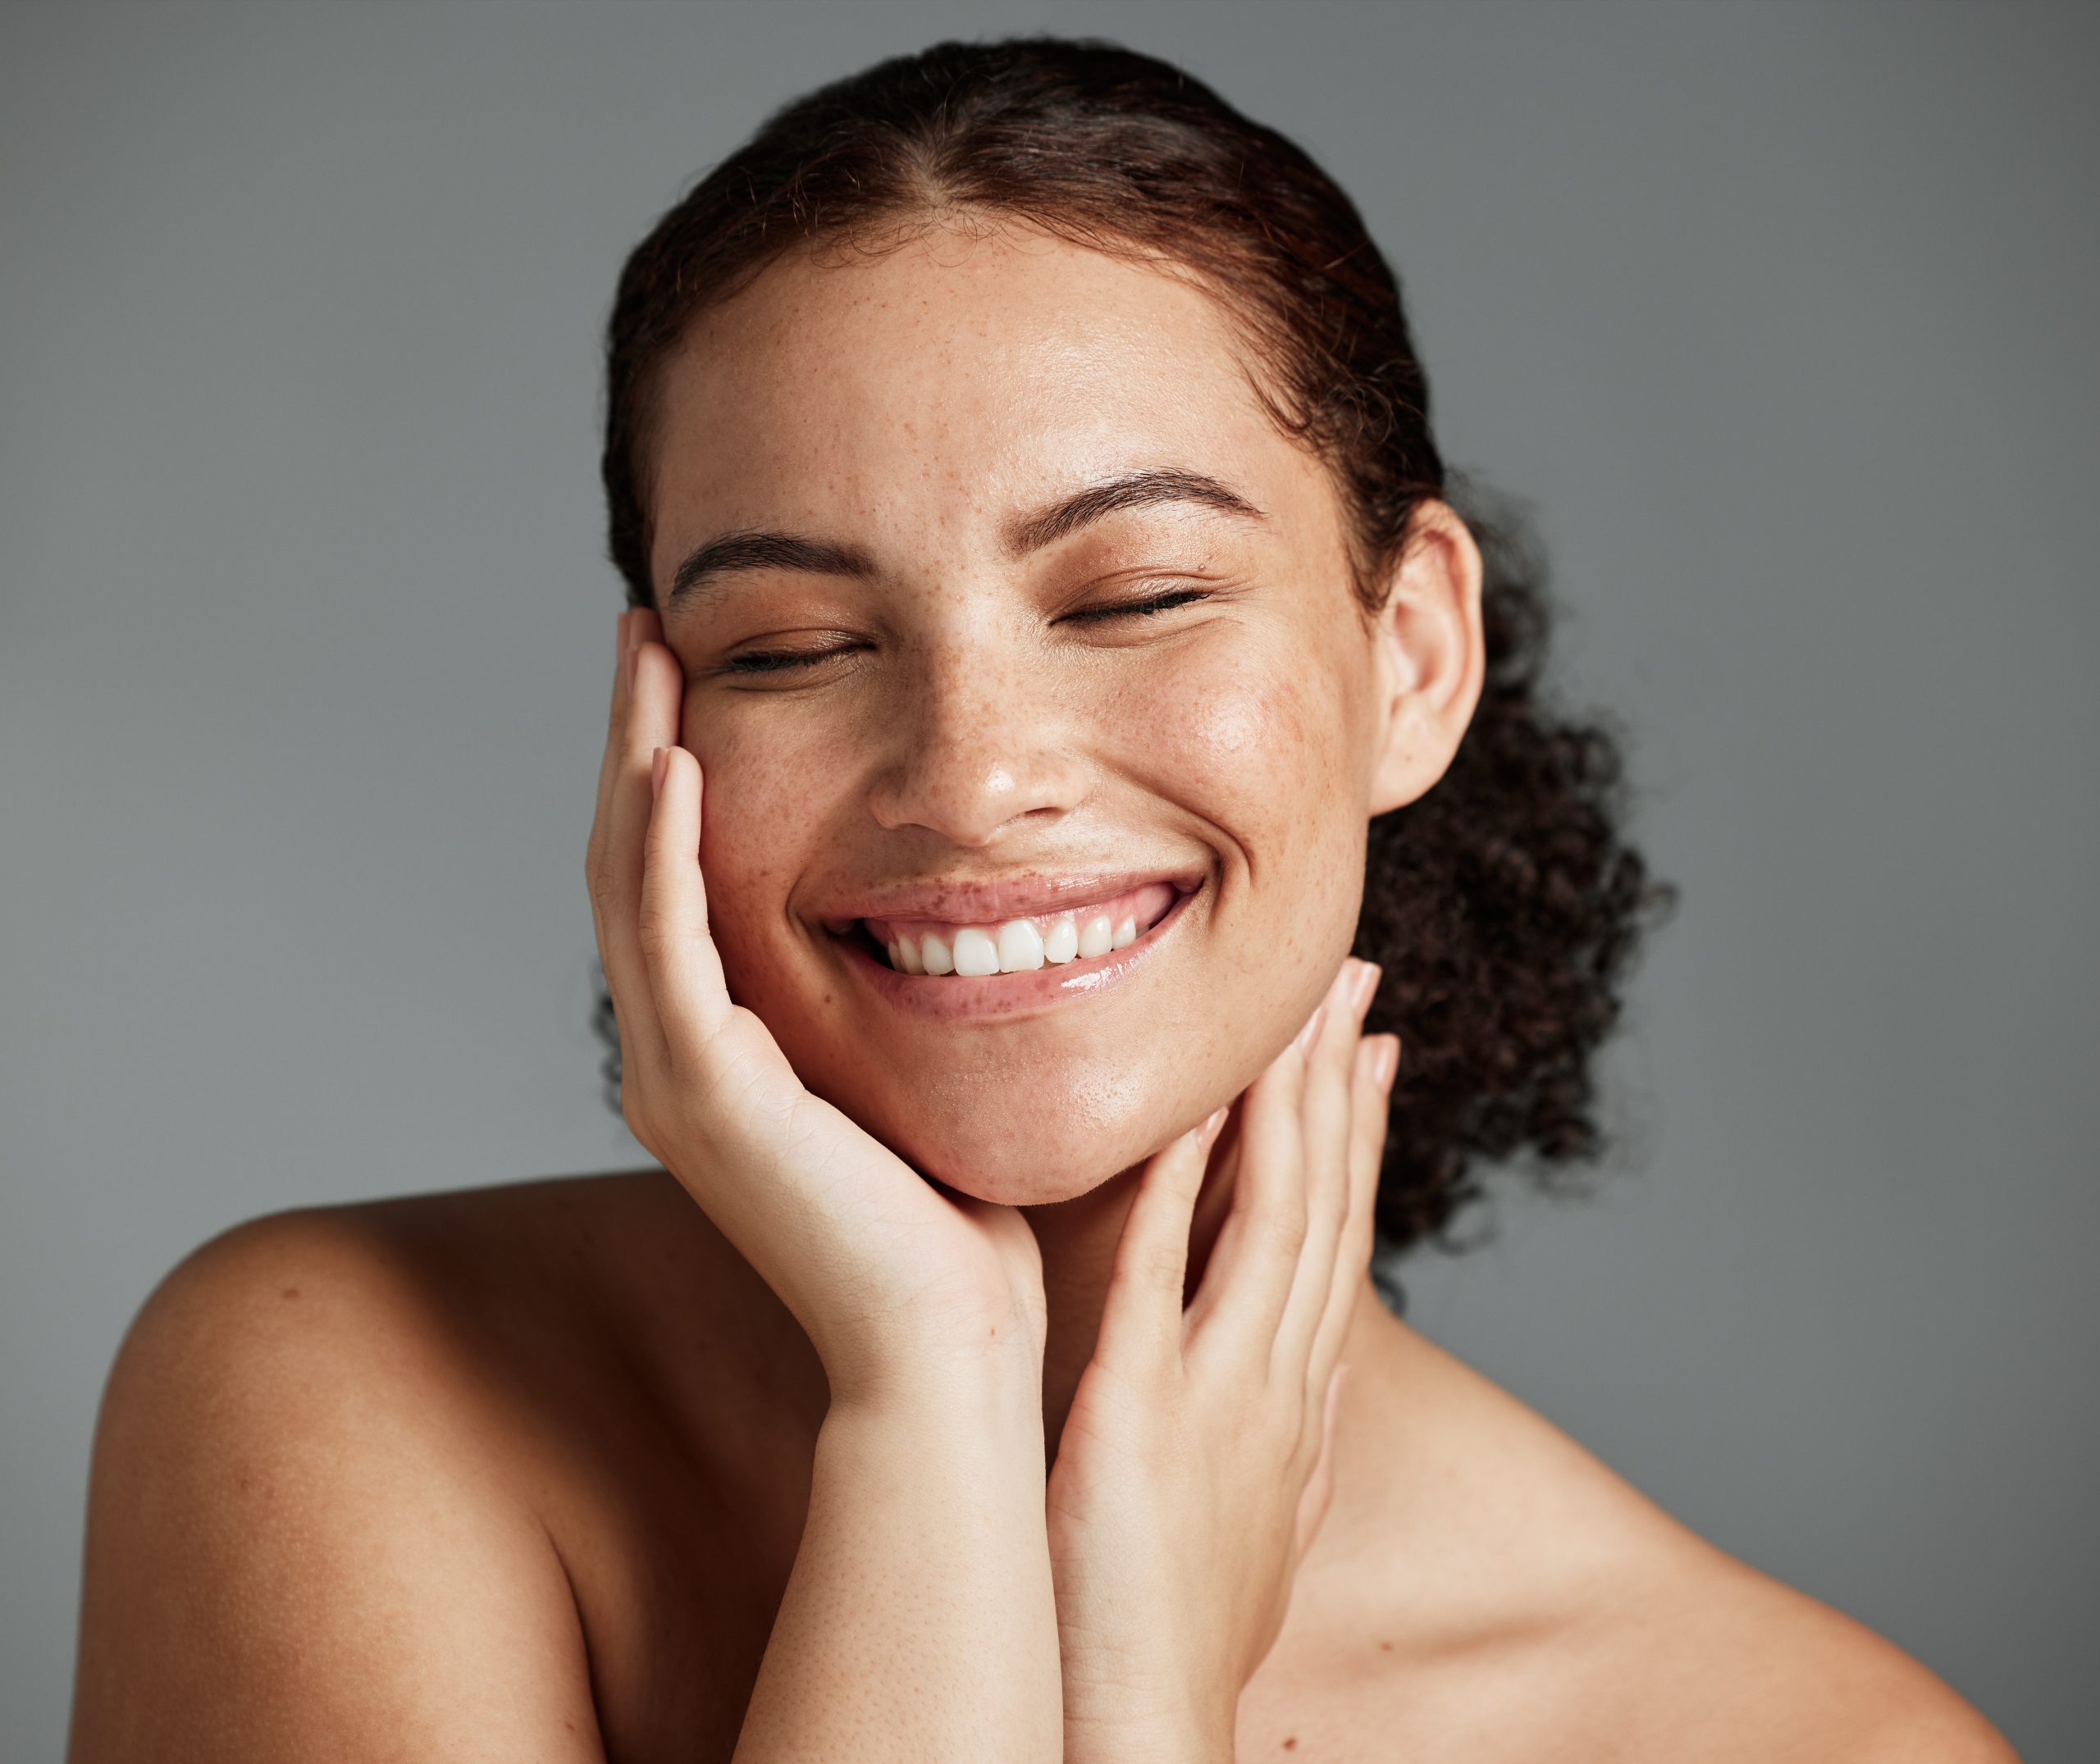
If there’s one thing that’s always in style, it’s youthful, natural, hydrated, and glowing skin. And this Spring, the beauty pros agree that the fresh-faced beauty trend is here to stay. This trend is all about creating a look that appears free of any makeup, with a focus on healthy, radiant skin that’s full of moisture and glow.

According to beauty experts, the no-makeup makeup look is making a comeback this Spring. The key is to enhance your natural features with minimal makeup while also focusing on the basics of a good skincare routine. This means using hydrating and nourishing products that help create a lit-from-within glow.

One of the reasons why the fresh-faced trend is so popular this season is the abundance of illuminators and new foundations that have a gorgeous, dewy finish. These products are infused with skincare elements that help to hydrate and nourish the skin, while also providing a luminous glow that’s perfect for Spring.

At Colorlab, we believe that healthy skin is the foundation of any great makeup look. That’s why we’ve developed a range of hyper-effective skincare products and makeup that looks like skin. With the right products and techniques, you can achieve a fresh-faced look that’s perfect for Spring and beyond.

How to Create a Flawless Complexion

To achieve a fresh-faced look, it’s essential to focus on creating a flawless complexion that appears free of any makeup. This means starting with a good skincare routine that helps to hydrate, nourish, and protect the skin. Begin by cleansing your skin thoroughly and using a gentle exfoliant to remove any dead skin cells. Follow up with a nourishing moisturizer and sunscreen to protect your skin from harmful UV rays.

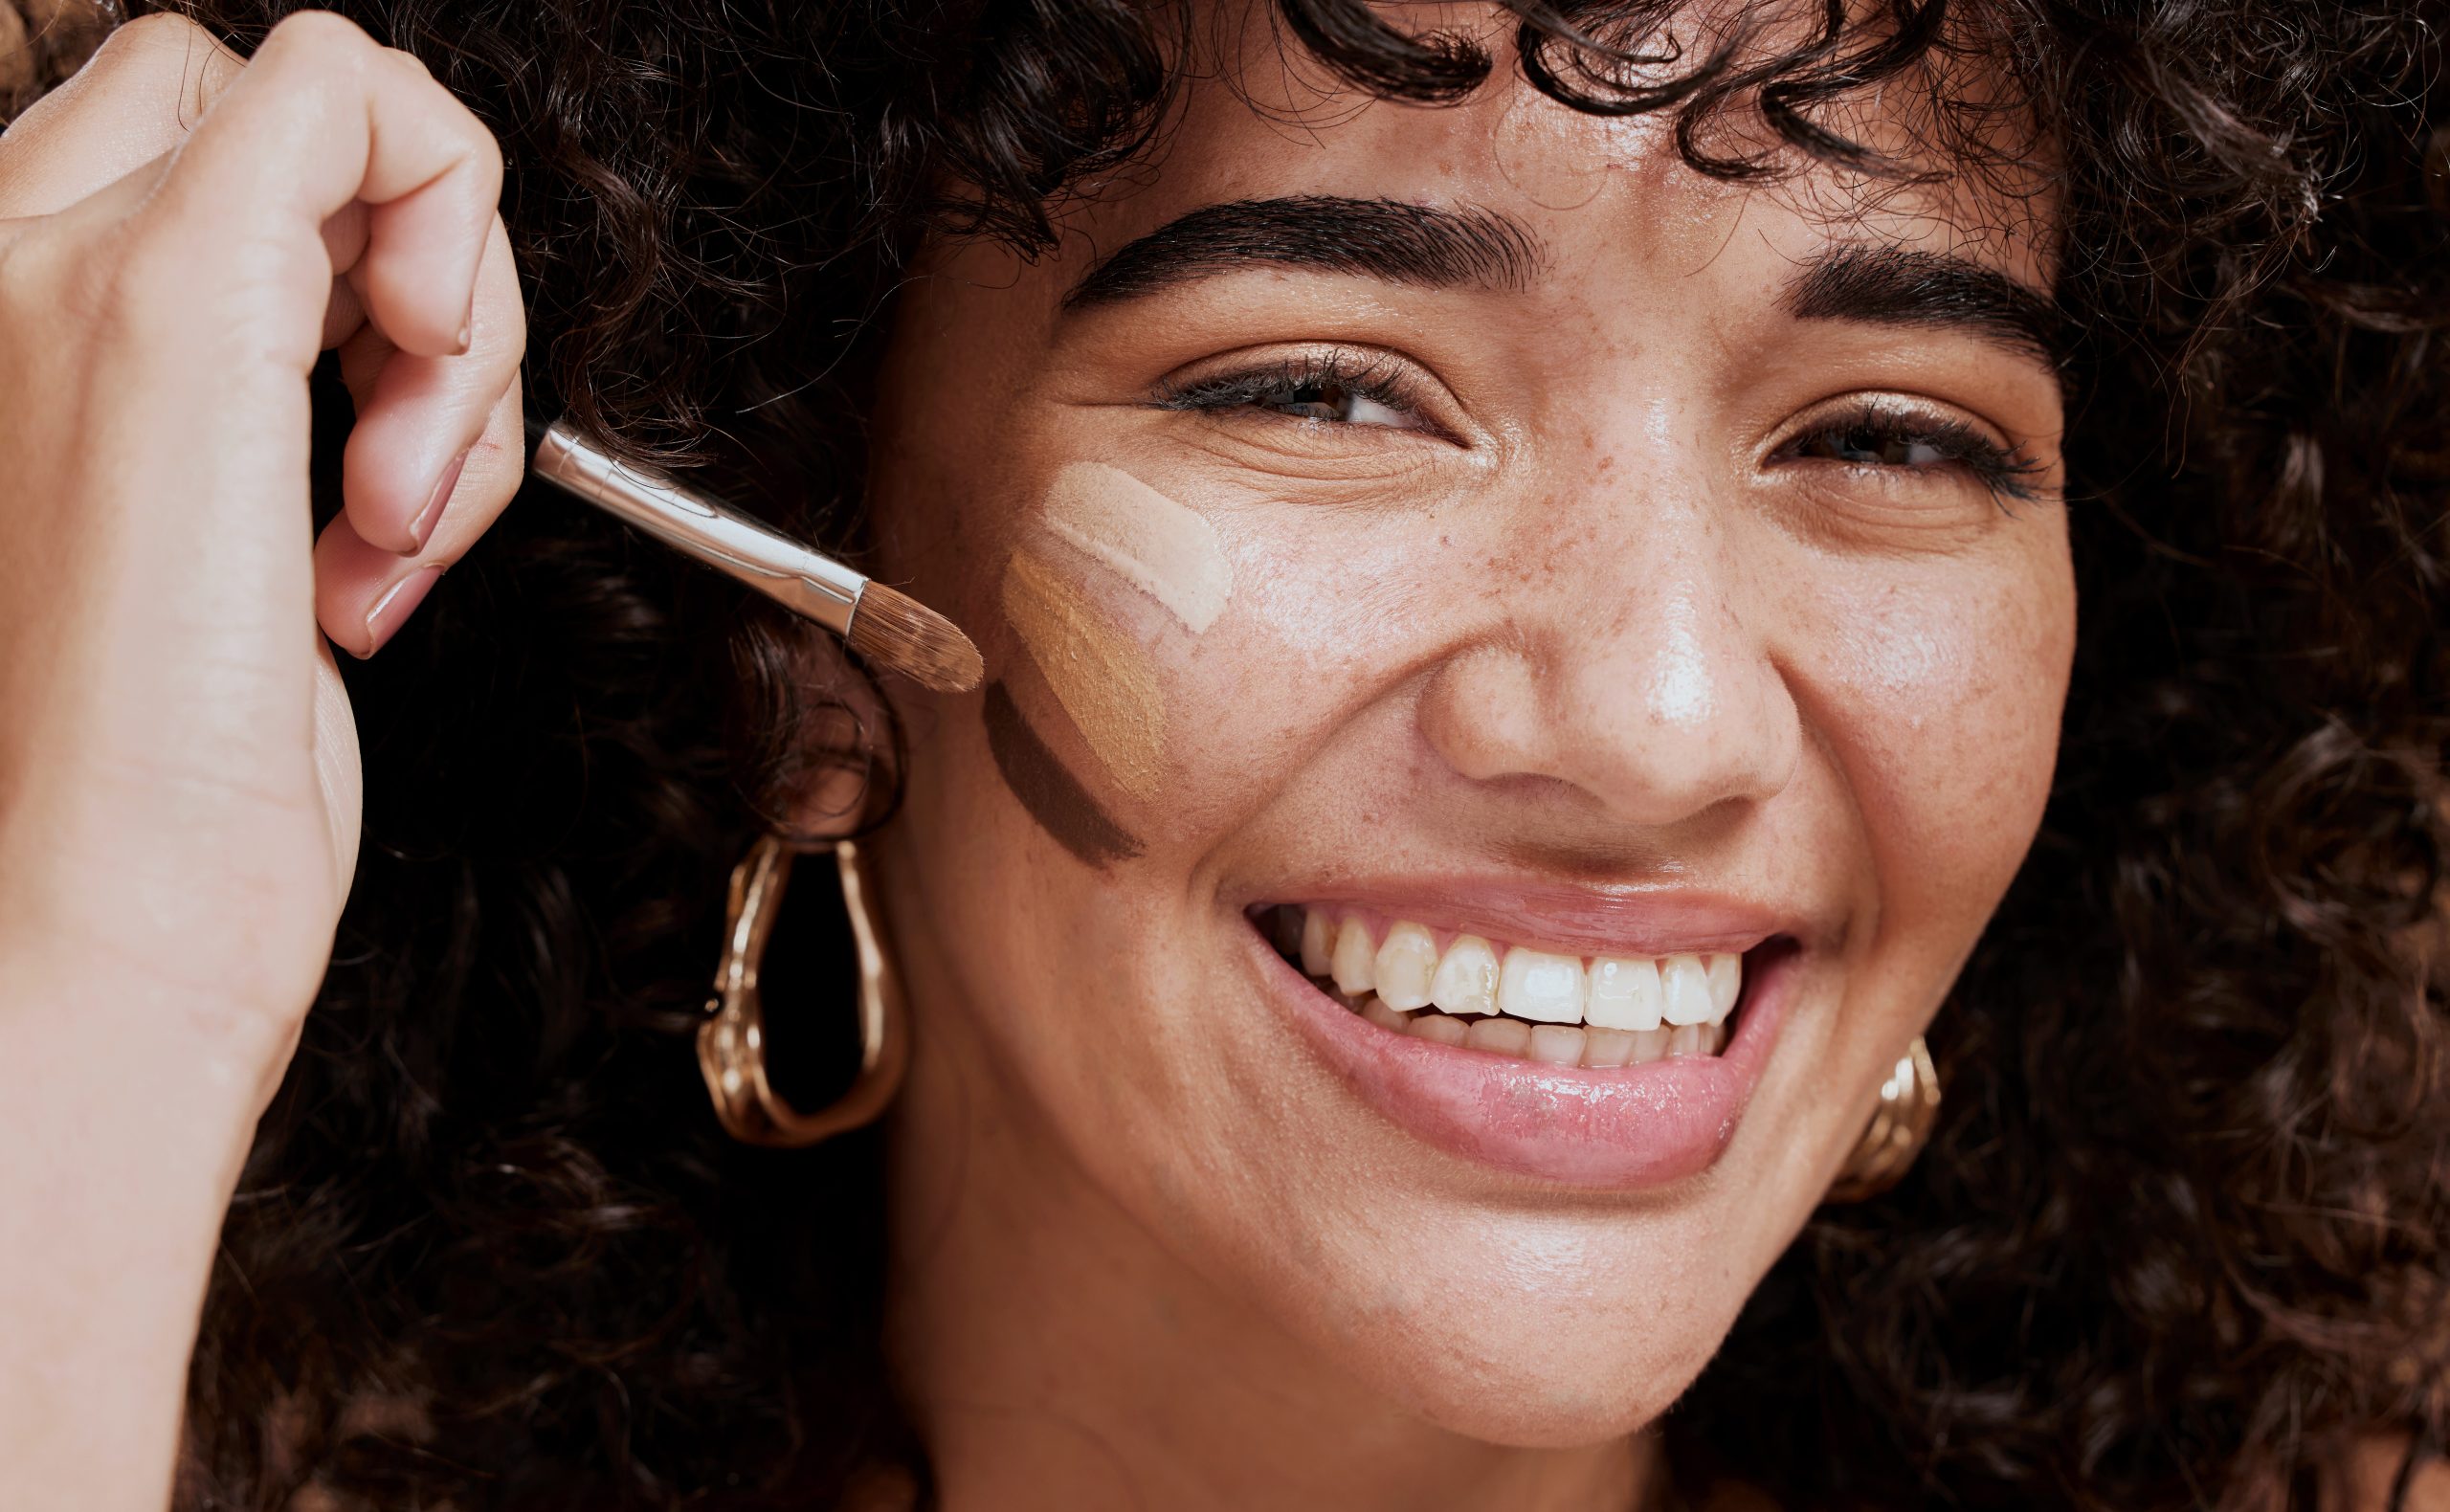
Next, create a flawless base for your makeup by using a tinted moisturizer that suits your skin tone and preferences. A tinted moisturizer is perfect for achieving a natural-looking coverage that evens out your skin tone without looking heavy or cakey. Choose a formula that’s infused with skincare ingredients like hyaluronic acid or vitamin C to hydrate and nourish your skin while providing a sheer, dewy finish.

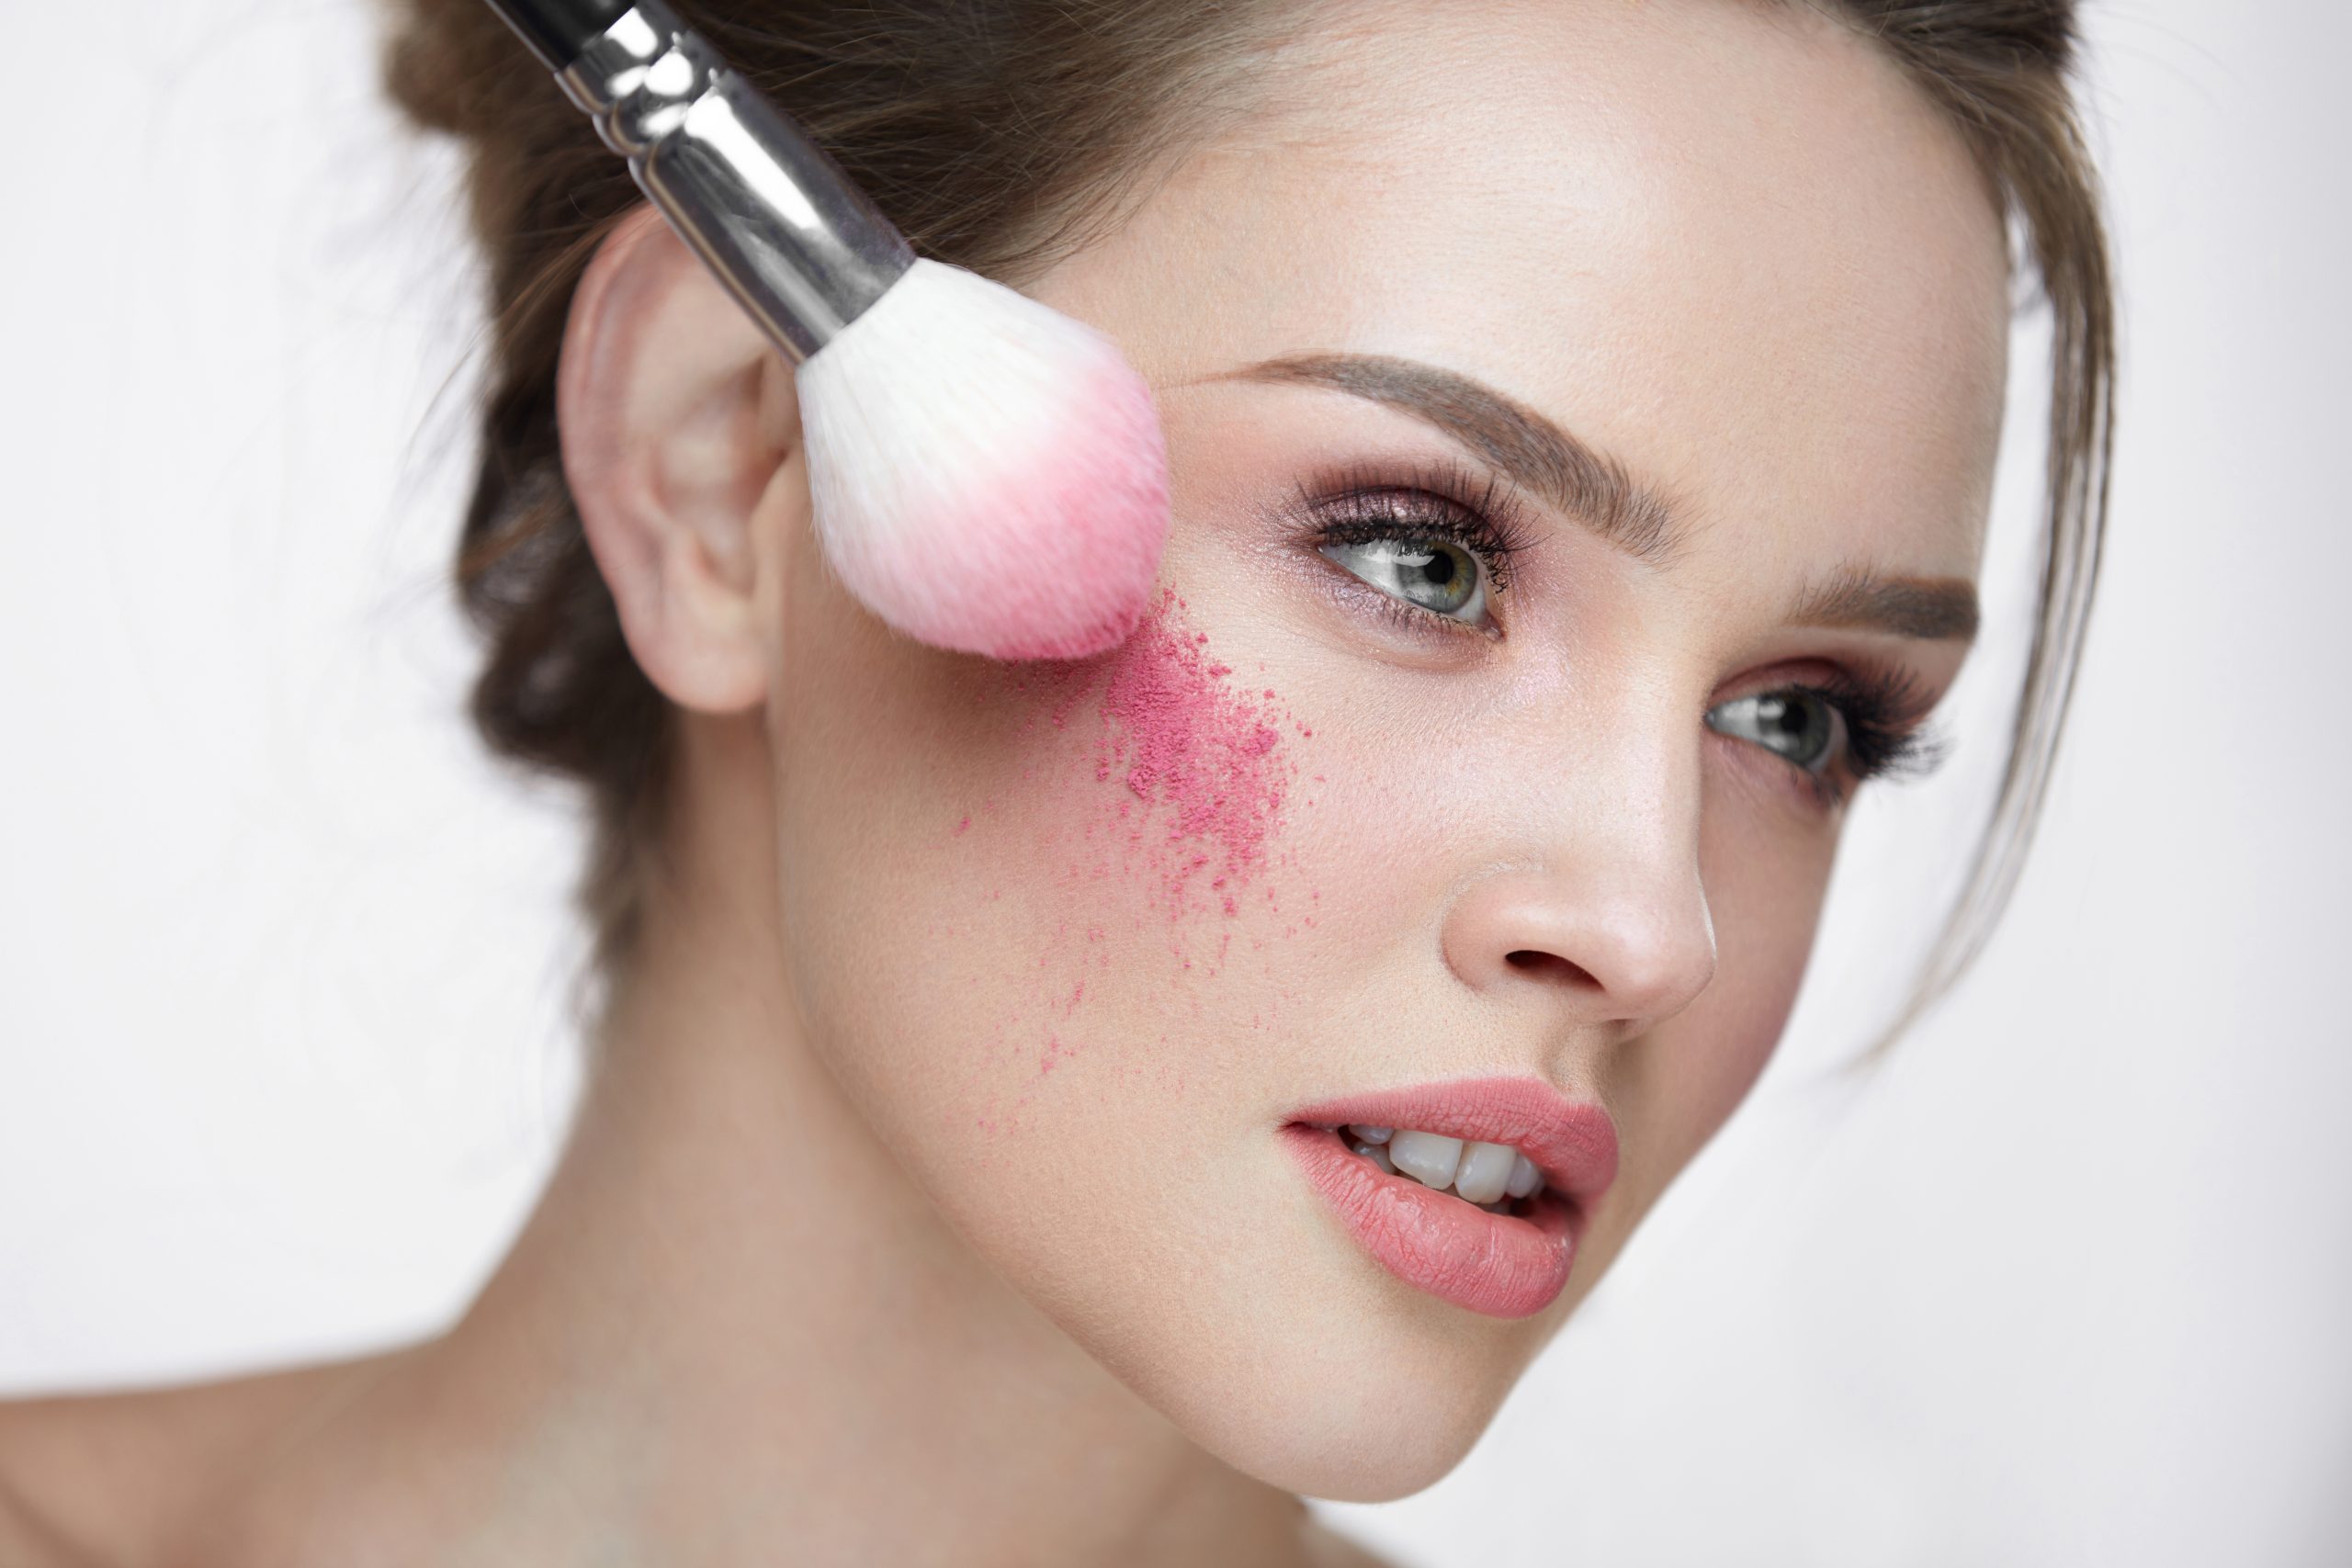
Next, use a cream cheek tint to give your cheeks a rosy, sun-kissed lift. We recommend applying this after your tinted moisturizer but before your bronzer. Apply it to the apples of your cheeks, and even a bit on the bridge on your nose. Use your fingers or a beauty sponge to blend it out.

Use a warm-toned bronzer to liven up your complexion to add some dimension to your look. A bronzer can be used to contour your face and add a subtle, sun-kissed glow that looks natural and radiant. Apply bronzer to the areas where the sun naturally hits your face, like your forehead, cheeks, and nose.

Finally, finish off your fresh-faced look by using a highlighter to add some subtle shine to your cheekbones, brow bone, and cupid’s bow. Choose a highlighter that’s customized to your skin tone and preferences using Colorlab’s custom blend systems, and opt for a formula that provides a natural-looking glow without any glitter or sparkle.

With the right skincare and makeup routine, you can achieve a flawless, fresh-faced complexion that’s perfect for Spring. Customize your products with Colorlab’s custom blend systems to create the perfect shades and formulas for your unique skin tone and preferences. The result will be a radiant, natural-looking glow that enhances your natural beauty and leaves you feeling confident and beautiful.

Creating the Perfect Products

One of the best things about Colorlab’a custom blend systems is the ability to create the perfect shades and formulas for unique skin tones and preferences. Not only do we offer a foundation system that can be used to create any shade and formula of foundation imaginable, but we also offer a mineral powder system that can be used to create blush, eyeshadow, face powders, and bronzer.

To create a beautiful tinted moisturizer that’s customized to your skin tone, use the following formula with Colorlab’s custom blend system:

  • 30 ml mineral moisture tint base

  • 1ml copper peptides

  • .- 5ml ultra-firming complex

  • 2 pumps of pearl toner

  • Add toners as needed for the client’s skin tone

This formula will provide a sheer, natural-looking coverage that evens out your skin tone while providing nourishing skincare ingredients. Plus, with Colorlab’s custom blend system, you can create the perfect shade for your unique skin tone.

Next up, create a beautiful lip and cheek tint using our custom blend lipstick kit like this summery peach shade, “Time and Time Again.” You can create it yourself using the following formula:

  • .125 Red Red Pigment

  • .125+.125 Brown Pigment

  • .25 +.125+.125 Peach Pigment

  • 1 ml Silkening Modifier

If you like this color but don’t have our custom blend kit, you can purchase it from our Ready-to-wear collection in the shade “Barely There.”

To customize your bronzer, use the following formula with Colorlab’s mineral powder system:

  • 1/2 t Sunlight Gold

  • 1/2 t Medium Mineral Powder

  • 1/4 t Antique Gold

  • +1/4 t Rose Gold

  • 1/8 t Brass

  • 1/4 t Agate

This formula provides a subtle, sun-kissed glow that’s perfect for Spring. Plus, with Colorlab’s mineral powder system, you can create a range of other products, such as blush, eyeshadow, face powders, and bronzer.

If you don’t have the custom blend systems, don’t worry. You can still achieve a beautiful Spring look with Colorlab’s ready-to-wear products, such as the Sundrenched bronzer. This product provides a gorgeous, natural-looking glow that’s perfect for achieving the fresh-faced beauty trend.

Closing Thoughts

Creating a beautiful, fresh-faced Spring look enhances natural beauty with minimal makeup and focuses on healthy, radiant skin. With Colorlab Cosmetics’ custom blend systems, you can customize your skincare and makeup routine to create the perfect tinted moisturizer and bronzer formula for your unique skin tone and preferences. And with the Fresh-Faced Beauty Trend in full swing, there’s no better time to try out this natural, radiant look.

Remember, achieving a flawless complexion starts with a good skincare routine that helps to hydrate, nourish, and protect your skin. Use a tinted moisturizer and bronzer that are customized to your skin tone and preferences to create a natural-looking coverage that evens out your skin tone and adds some dimension to your face. Finish off your look with a highlighter to add some subtle shine and create a lit-from-within glow.

Whether you’re a seasoned beauty pro or a budding entrepreneur, Colorlab Cosmetics’ custom blend systems make it easy to create the perfect shades and formulas for your unique skin tone and preferences. With these tips and techniques, you’ll be able to achieve a beautiful, fresh-faced look that’s perfect for Spring and beyond. So get ready to glow and enjoy a flawless complexion that enhances your natural beauty and leaves you feeling confident and beautiful.
Open post

Skin Cycling: The TikTok Trend Changing The Skincare Industry – Is It Worth the Hype?

TikTok has rapidly become the go-to platform for discovering the latest trends in beauty and skincare. One such trend that has taken the platform by storm is ‘skin cycling’. But what exactly is skin cycling? Is it a legitimate practice, and if so, what products make the most sense to include in a skin cycling routine? As a leading B2B makeup manufacturer and private label company, Colorlab is here to dissect this trend and help you understand its implications for the skincare industry.

What is Skin Cycling?

Skin cycling is a skincare approach that focuses on strategically applying and alternating skincare products with “rest” days in between to optimize their benefits and minimize irritation. The concept revolves around using active ingredients in a planned routine that typically spans over four nights, with the first night dedicated to exfoliation, the second night to applying retinoids, and the third and fourth nights for recovery or rest.

The idea behind skin cycling is to give the skin a chance to repair and recover from the effects of potent ingredients like exfoliants and retinoids. By allowing the skin to rest and recuperate, the risk of irritation and inflammation is reduced, and the overall health of the skin is improved. This approach also promotes a more strategic use of skin care products rather than piling them on top of each other, which can sometimes lead to negative reactions.

Skin cycling has recently gained popularity due to the growing awareness of the importance of rest and recovery in skincare. The catchy name “skin cycling” and its presence on social media platforms like TikTok and Instagram have further fueled its popularity. The trend highlights the need for a more thoughtful and balanced skincare routine, as opposed to simply using more products or ingredients.

Evaluating the Legitimacy of Skin Cycling

So that all sounds great, but does this TikTok trend actually hold any legitimacy? According to dermatologists, yes. Skin cycling can indeed be beneficial for many people, particularly those with sensitive skin or those looking to introduce potent ingredients like exfoliants and retinoids into their routines. The concept of alternating and giving rest days to the skin is supported by dermatologists, who have been recommending intermittent or alternating use of active ingredients for a long time.

Skin cycling can help repair the skin barrier, reduce the negative side effects of certain products, and protect the skin against seasonal issues. However, it’s important to note that the effectiveness of skin cycling may vary depending on individual skin types and conditions. It may not be necessary for those who already have a well-tolerated, established skincare routine with potent ingredients.

Essential Products for a Skin Cycling Routine

In a skin cycling routine, various products are incorporated to target specific concerns and maintain overall skin health. Key products to include in a skin cycling regimen are retinoids, exfoliants, serums and treatments, and moisturizers. Each product is crucial in addressing different skin issues and should be used strategically to maximize its benefits.

Retinoids

Retinoids are derivatives of vitamin A, which are known for their effectiveness in reducing the appearance of fine lines, wrinkles, and acne. They help promote cell turnover and improve skin texture. In a skin cycling routine, retinoids are typically applied on the second night of the cycle. It is important to cleanse and pat dry the skin before application. If your skin is sensitive, you can apply a moisturizer around sensitive areas before applying the retinol. After application, you can apply a moisturizer on top of the retinol to help reduce dryness and irritation.

Exfoliants

Exfoliants are essential for removing dead skin cells from the surface layer of the skin, which allows other skincare products to penetrate more deeply and work more effectively. In a skin cycling routine, exfoliants are typically used on the first night of the cycle. Chemical exfoliants, such as glycolic acid or salicylic acid, are preferred over physical scrubs because they tend to be gentler on the skin. To use an exfoliant effectively, cleanse your skin, pat it dry, then apply it, followed by a moisturizer.

Serums and Treatments

Serums and treatments are concentrated, concern-specific products that target particular skin issues, such as hyperpigmentation, uneven skin tone, or dehydration. These products usually contain active ingredients that work synergistically with the other products in your skin cycling routine. In a skin cycling regimen, serums and treatments can be applied during the recovery nights (nights 3 and 4) before moisturizing to provide added nourishment and support skin barrier repair. Ensure you choose a serum or treatment that addresses your specific skin concerns like our Time Bombs or Skin Infusions.

Moisturizers

Moisturizers are essential in any skincare routine, and in a skin cycling regimen; they help provide hydration and support the skin barrier. Opt for a fragrance-free ointment or cream, as suggested by the American Academy of Dermatology like any of our Colorlab moisturizers. Moisturizers should be applied every night in the skin cycling routine, regardless of the other products being used. During recovery nights, cleanse your skin and apply a moisturizer on damp skin to lock in hydration. You may also use a hydrating serum before moisturizing for added benefits.

Tips for Implementing a Skin Cycling Routine

Developing a skincare routine tailored to your unique needs is essential for maintaining healthy, radiant skin. To achieve this, it’s crucial to assess your skin’s specific requirements, gradually introduce new products, and monitor your skin’s response to the changes you make. Here are a few tips to help you create an effective and personalized skincare routine.

Assessing Your Skin’s Unique Needs

Start by identifying your skin type, which could be normal, dry, oily, combination, or sensitive. This will help you choose the right products for your skin. Next, determine your primary skin concerns, such as acne, signs of aging, pigmentation, or dehydration. By understanding your skin’s needs, you can select the most suitable products and create a targeted skincare routine.

Slowly Introduce New Products

When adding new products to your skincare routine, it’s essential to introduce them gradually to minimize the risk of irritation or adverse reactions. Start by patch-testing a small amount of the product on your inner forearm or behind your ear to ensure you don’t have an allergic reaction. If no reaction occurs after 24 hours, you can begin incorporating the product into your routine. Add one new product at a time and wait at least a week before introducing another to observe how your skin responds.

Monitor Skin Response

As you incorporate new products, pay close attention to how your skin reacts. If you notice any redness, irritation, or breakouts, discontinue the product and consult a dermatologist if necessary. Remember that your skin may take some time to adjust to new products, so be patient and give it at least a month to see visible improvements. Your skin’s needs may change over time due to factors like aging, climate, and hormonal fluctuations. Regularly reassess your skin and make adjustments to your routine as needed. Don’t hesitate to consult with a dermatologist or skincare professional for guidance on the best products and practices for your evolving skincare needs.

Closing Thoughts

In summary, skin cycling is a skincare practice that involves rotating products within your routine to address various skin concerns and prevent over-exposure to certain ingredients. To build an effective skin cycling routine, it’s essential to include retinol, exfoliants, serums and treatments, and moisturizers to target different skin needs. To create a personalized skincare routine, start by assessing your skin type and concerns, researching appropriate products and ingredients, introducing new products slowly, and monitoring your skin’s response to changes. Remember to adjust your routine as needed and consult a dermatologist or skincare professional for guidance. By following these tips, you can develop a tailored skincare routine that promotes healthy, radiant skin.

Open post

How to Achieve the Perfect Summer Lips with Colorlab

Now that spring is among us and the summer months are quickly approaching, it’s time to start refreshing our makeup routines. And one of the most important aspects of a perfect summer look is hydrated, supple, beautiful lips. In this article, we will show you how to achieve the perfect summer lip with proper prep, and application. And we will also show you how to create a stunning summer lipstick shade using our custom blend systems. Keep reading to see how you can achieve the perfect summer lip for you and your clients!

Exfoliate your lips

Exfoliating your lips is the first step to achieving the perfect summer lips. It helps to remove any dead skin cells and create a smooth surface for lipstick application. You can purchase a lip scrub specifically made for this purpose or make your own using natural ingredients like sugar and honey. Simply mix together equal parts of both ingredients and gently rub it onto your lips in circular motions. After exfoliating, rinse your lips with warm water and apply a light lip balm such as our 24-7 lip treatment pot. Doing this will help keep your lips hydrated throughout the day and give you a smooth canvas to work on.

Prime your lips

Before you apply your lipstick, it’s important to make sure your lips are prepped and primed. A good lip primer will help lock in your lip color, prevent fading and bleeding, and provide an extra dose of moisture. For the perfect summer lips, try Colorlab’s Lip Fix – an all-in-one lip primer that provides hydration while locking down your lip color. This product helps prep your lips for the perfect application of your favorite lipstick. It also helps to protect against environmental stressors that can cause damage to your lips. The Lip Fix helps to keep your lipstick in place for hours so you don’t have to worry about touch ups or fading throughout the day.

Choose the perfect shade

When it comes to choosing the perfect summer lip shade, the options are endless. The key is to find the right combination of warm and cool tones that will best flatter your skin tone and facial features. A great choice for creating a subtle, yet bold statement is the Pink Champagne High Frost Butter Lipstick that we created on the spot with our custom blend systems (keep reading to get the formula.).

This delicate blend of neutral pinks, golds and champagnes creates a sheer color that will look beautiful on any complexion. For those looking for something a little more daring, Colorlab’s custom blend systems offer a variety of shades to choose from so you can create the perfect lipstick for your summer look. When applying the lipstick, use an angled brush to apply the product directly onto the lips, working from the outer corners inwards for a smooth finish. Once you have found the perfect shade for your summer look, you’ll be ready to take on summer with the perfect pout!

Line your lips

Adding definition to your lips is an important part of achieving the perfect summer lips. To do this, you will need a lip liner that matches or is one to two shades darker than your lipstick. Start by tracing the outer edge of your lips and blend it inwards. To make sure your lip line stays in place all day, choose a lip liner with a long-lasting formula. You can also use a lip brush to blend the liner inwards and to create a more natural finish. Remember to always use a light hand when applying lip liner.

Fill in your lips

Once you have lined your lips with a lip liner, it’s time to fill them in. The key to achieving the perfect summer look is to find the right lipstick shade and texture. Colorlab offers a unique customizable blend system that allows you to create your own signature shade of Pink Champagne High Frost Butter Lipstick. This highly-pigmented lipstick provides long-lasting color and a semi-glossy finish.

To apply the lipstick, start at the center of your upper lip and move outward toward one corner. Use small strokes and blend the color out towards your lip line. Repeat on the other side. When you’re done, press your lips together lightly to even out the color and get rid of any excess product. You can also use a brush to blend the color for a more precise look. To finish off your look, add a touch of gloss to the center of your lips for extra shine.

Apply lip gloss

For a perfect summer lip, finish with a layer of lip gloss. Gloss will add an extra dimension of shine and dimension to your lips. To apply, start at the center of your lips and work outwards. You can either use a brush for even coverage or use your fingertip for a more natural look. You may want to choose a sheer lip gloss or opt for a bolder hue for extra drama. No matter what color or texture you choose, make sure to dab on a little bit at the center of your lips for maximum impact. Finish with a few blots to keep it looking fresh and hydrated all day.

How to create the perfect summer shade

Creating the perfect summer lipstick is easy with Colorlab’s custom blend systems! Our Pink Champagne High Frost Butter Lipstick is a must-have for any makeup artist, beauty professional, or brand owner. To achieve this beautiful lip color, you will need the following formula:

  • Butter Base

  • Coral Pigment: .125 x3

  • Brown Pigment: .125

  • White Pigment: .125 x4

  • Diamond Dust Frost: 1 LG scoop

  • Champagne Frost: 1 SM scoop

  • Pink Gold Frost: 1 SM scoop

  • Twinkle Foil: 2 Tiny Scoops

  • Moisture Additive: .5ml

  • Lime ‘n Coconut Flavor: 3 drops

  • Citrus Essence: 3 drops

Open post

The Blush Trend of 2023: How to Get the Perfect Flush

Are you ready to learn about the hottest spring makeup trend of 2023? Well, you’re in luck because today we’re talking about blush! That’s right, this year’s fashion and beauty industry is all about adding a touch (or a lot) of rosy glow to your cheeks. Whether you prefer a natural flush or a bold pop of color, there’s a blush out there for everyone. So, if you’re curious about how to rock this trend, keep reading because we’ve got all the tips and tricks you need to know. Get ready to blush your way through 2023!

What is the spring blush trend of 2023

Once again, we have social media to thank for this viral blush trend that we are sure to see more of as we enter the spring season. The trend involves applying ample amounts of blush on the cheeks and even the forehead, temples, and even the nose. More so, influencers have released videos teaching users how to apply blush to their eyelids and chins and get more versatility out of the long-forgotten staple. Beauty brands are releasing more blushes than ever (liquid blush being a craze of its own) to keep up with the demand.

Ways to incorporate the blush trend into your look

There are so many fun and creative ways to incorporate blush into your look, whether you’re going for a subtle everyday look or something more dramatic.

Of course, you can apply it to the apples of your cheeks in a traditional sense, but of course, be generous!

One of our favorite ways to use blush is to apply it to the bridge of your nose and the tops of your cheeks to create a sun-kissed effect. This can give you a healthy, natural-looking glow that’s perfect for the summer months.

Another fun way to use blush is to apply it to your eyelids for a monochromatic look. Simply choose a shade that complements your skin tone and blend it onto your lids for a subtle pop of color that ties your look together.

If you’re feeling bold, you can also try using blush almost as you would with contour to enhance your features in a unique way. Apply it to the hollows of your cheeks and along your jawline to define your features and create a more sculpted look.

For a more natural take on the look, try opting for a mineral blush or mixing it with a highlighter for a sheer, skin-like look.

To get more function out of the product, you can even experiment with using blush as a lip color. Just dab a little bit onto your lips and blend it in with your fingers for a soft, matte finish that’s perfect for daytime.

Finally, don’t be afraid to mix and match different shades of blush to create your own custom look. You can blend two or three shades together to create a unique color that’s perfectly tailored to your skin tone and style.

Overall, there are so many fun and creative ways to incorporate blush into your makeup routine. Whether you’re a fan of natural-looking radiance or bold, dramatic pops of color, there’s a way to use blush that’s perfect for you.

How to find the perfect blush

Finding the perfect blush can be a personal and subjective process, as different shades and formulas will work differently for different skin types and preferences. However, here are some tips that can help you find the right blush for you:

Determine your skin tone: Blushes are often categorized by skin tone, so it’s important to figure out whether you have a warm, cool, or neutral undertone. This will help you choose a shade that complements your skin tone.

Consider your skin type: Different blush formulas work better for different skin types. For example, if you have oily skin, you may want to opt for a powder blush, while if you have dry skin, you may prefer a cream or liquid formula.

Think about your preferred finish: Blushes come in different finishes, such as matte, satin, or shimmer. Consider which finish you prefer and which will work best with your skin type. For instance, drier skins may want to opt for a luminous or skin finish, whereas more oily skin types will likely prefer matte.

Don’t be afraid to ask for help: If you’re unsure about which blush to choose, don’t be afraid to reach out to our team, and they will be happy to help you find the best ready-to-wear shade or blend the perfect formula using our custom blend systems.

Blend your own blush

Of course, one of the best ways to set your business ahead is to create your own blush using our patented custom blend systems! If you are already using them, we just posted a video on our Insta about how you can create a dupe of the viral Dior Backstage blush. (If you’re looking for a private-label dupe, check out our ready-to-wear shade, First.

P.S. did you know that we sell a powder press for your foundation, eyeshadow, blush, and more? Talk to us if you’re interested!

Open post

The Ultimate Guide to Foundation Formulas

Foundation is the base of any good makeup routine. With so many different types of foundation out there, it can be hard to know which one is best for you and your skin type. In this blog post, we’ll discuss the three main types of foundation—silicone-based, water-based, and oil-based—and explore the advantages and disadvantages of each for different skin types. This will help you make an informed decision about which foundation is right for you. So let’s get started!

Silicone-Based Foundation

Silicone-based foundation is frequently preferred for a long-lasting or specific look.

What is a Silicone-Based Foundation?

Silicone-based foundation is a popular choice for those with normal skin types. Silicone is a synthetic material, most commonly seen in the form of dimethicone (or other ingredients that end in “cone,”or siloxane), that creates a barrier on the skin to keep oils and moisture in.

Who is a Silicone-Based Foundation Good For?

Silicone-based foundations are great for someone who wants a blurred effect. Depending on the formulation, this includes those with fine lines and wrinkles or uneven texture and enlarged pores.

Advantages of Silicone-Based Foundation

The longest-wearing type of foundation is frequently touted to be silicone-based. This is so that silicone can help prevent makeup from fading throughout the day by forming a barrier on the skin. Also, it aids in laying down a uniform, smooth foundation for other cosmetics.

It also has a light, airy texture and doesn’t feel heavy or greasy, and offers a soft matte finish, making it ideal for people with larger pores or wrinkles or those who want to achieve a blurred or soft-focus skin effect. Its light consistency also allows it to be easily blended into the skin.

Disadvantages of Silicone-Based Foundation

There are some drawbacks to silicone-based foundations. It is a common irritant for those with sensitive skin. Additionally, some people may experience an allergic reaction when using products containing silicone.

Water-Based Foundation

Water-based foundation is another one of the most popular and widely used types of foundation. It’s a great option for those with dry, dehydrated, sensitive, or problem skin.

What is a Water-Based Foundation?

Water-based foundation has little to no silicone or oil and tend to have nourishing and skin-loving ingredients to help maintain a moisturized look. Our Colorlab water-based foundations include Superior Performance, Natural Foundation and Mineral Moisture Tint.

Who is a Water-Based Foundation Good For?

Water-based foundation is great for dehydrated, acne-prone or problem skin. It also often comes packed with skin-loving ingredients, making it an ideal choice for most skin types.

Advantages of Water-Based Foundation

Water-based foundations are typically lighter in texture than silicone or oil-based formulas, making them a good choice for those who don’t like the feeling of heavier makeup. Water-based foundations also tend to provide more sheer/medium coverage than their silicone or oil-based counterparts, so it’s ideal for those looking to achieve a more natural look. Water-based foundations are also extremely gentle on the skin.

Disadvantages of Water-Based Foundation

Water-based foundations typically are not as long-wearing or full-coverage as silicone foundations, so skin prep and finishing products help with this.

Oil-Based Foundation

Oil-based foundation is a popular choice among those with dry and mature skin types.

What is an Oil-Based Foundation?

An oil-based foundation, like our Cream to Powder compact, is a foundation that uses oil as its primary ingredient. Oil-based foundations generally offer a good amount of coverage and provide a natural or dewy finish.

Who is an Oil-Based Foundation Good For?

Oil-based foundations are great for those with dry skin types, this can help counteract dryness and provide a healthy sheen and glow to the skin.

Advantages of Oil-Based Foundation

The key advantages of oil-based foundation are that it provides maximum coverage and can help to hydrate and nourish the skin. Additionally, oil-based foundations often contain anti-aging ingredients, such as Vitamin E, which can help to reduce the appearance of wrinkles and other signs of aging. Lastly, oil-based foundations tend to be more resistant to sweat, humidity, and other environmental factors, making them a great choice for those with active lifestyles.

Disadvantages of Oil-Based Foundation

The downside of an oil-based foundation is that it can be difficult to blend, and if you have oily skin, it may make your skin look even shinier or greasy feeling. Additionally, oil-based foundations are not recommended for anyone prone to breakouts, as they are trying to balance an overproduction of oil, which can lead to skin problems such as acne.

Choosing the Right Primer

Now that we’ve discussed the different types of foundations let’s talk about how to choose the right primer to get the most out of the product. Primers can be a great way to create a smooth base before applying your foundation and make it last longer throughout the day, primers offer the same advantages and disadvantages to the skin as the foundations, depending on the type of primer you choose.

It’s a good idea to opt for a primer that has a similar formulation as your foundation. If you are looking for a flawless finish, choose Sheer Porefection to give you a smooth and matte canvas. Daily Dose and Fringe Benefit are going to be great to boost your hydration, and a light amount of our Beauty Oil can be used to prep your skin. It all goes back to the formulation of your foundation. We want our prep and finishing products to complement the formulas of your foundation.

Closing Thoughts

Now that we’ve discussed the different types of foundations, hopefully, you can make better product selections for you and your clients. If you need help learning about the different types of foundations that we offer, be sure to contact us today!

Open post

Get Ready to Rock This Valentine’s Day With These 7 Makeup Looks

Valentine’s Day is coming up, and we know you’re wondering what to do with your makeup. Whether you’re going for a romantic dinner with your significant other or a night out with friends, there is a perfect makeup look for every Valentine’s Day occasion—or any other time you want to add some extra love to your look. In this article, we will give you 7 makeup looks that you can rock with confidence this year.

1) Natural – Subtle Eyes with a Skin Focus

If you want to keep it simple yet chic this Valentine’s Day, a natural makeup look may be the way to go. The focus should be on skincare and subtle eye makeup. Start by prepping your skin with a moisturizer that suits your skin type. Follow up with a primer, as it will help create a smooth canvas for makeup application. Then use a foundation and concealer to even out your skin tone.

For your eyes, keep it simple with a nude or light brown eyeshadow that complements your skin tone. Use a fluffy blending brush to create a seamless effect and blend lightly. To finish off the look, add some mascara and a soft pink blush for a hint of color. Finally, choose a natural lip color like a sheer nude or pink gloss. You’ll have an effortlessly beautiful look that enhances your natural features.

2) Bold – The Pink Smoky Eye

If you’re looking to make a statement this Valentine’s Day, go bold with a pink smoky eye look. Start by priming your eyelids and then apply an opaque pink eyeshadow all over the lid, blending it up and out. Next, apply a mid-tone pink shade in the crease, blending it up and outward for a more dramatic look. For even more drama, take a black eyeshadow and blend it into the outer corner of your eyes, creating a winged effect. Finish off the look with some false lashes, and you’re ready to turn heads!

3) Flirtatious – A Hint of Pink

For a flirty and fun look, try a hint of pink! Start by prepping your skin with your favorite primer and foundation. For a natural flush, opt for a rosy blush to the apples of your cheeks.

To create this look, you’ll want to start with a light eyeshadow in a shimmery pink shade. Sweep it across the lids, making sure to focus on the inner corners of the eyes. Then, blend a slightly darker pink shade into the crease of your eye and blend it outwards. To complete the look, add a coat of volumizing mascara to the top and bottom lashes.

For the lips, choose a medium-pink hue with a glossy finish. This will give your look just the right amount of shine and color to bring out your beautiful features. Add a few individual false lashes to the outer corners of your eyes for an extra pop, and voila – you’re ready for Valentine’s Day!

(For a tutorial on this type of look, check out our latest Instagram post)

4) Trendy – White Angel Eyes

In case you missed our posts on angel eyes, well….now is the time to check them out. To embrace one of the latest trends that also offers a romantic flare, Valentine’s day is the perfect opportunity to give this look a try. It features an (as the name would imply) angelic eye look with a white shimmery focus and an otherwise neutral-look

Use our custom blend formula to blend your own metallic white shadow, or opt for one of our ready-to-wear shades like Mother of Pearl to put all over the lid.

5) Sexy – The Sultry Smoky

For a sexy look on Valentine’s Day, look no further than the classic smoky eye. To get this look, start by applying a light base eyeshadow all over your eyelids. Next, apply a dark shade to the crease of your eyelids and blend. Finish by adding some darker shades to your outer corners and blend them inward toward the inner corner for a dramatic and sultry look. For some added oomph, add some black or dark grey eyeliner to your upper and lower lash line. Finish with mascara and some false lashes for added glam. To keep the focus on the eyes, opt for a nude lip. This will let the smoky eyes take center stage and ensure that you’re looking your best for date night.

6) Classic – Winged Liner and Red Lip

The classic winged liner and red lip makeup look never fail to make a statement. This look is the perfect choice for those looking to capture a timeless, romantic look. To start, use a liquid eyeliner to draw a wing that starts close to the inner corner of your eye and extends outwards. Fill in the remaining portion of your lid with a neutral or shimmery shadow. Apply a few coats of mascara, then finish with a bold red lip color. You can either apply a lip liner or just directly apply the lip color. Finally, set the whole look with a light dusting of translucent powder. With this look, you will be sure to turn heads this Valentine’s Day.

7) Romantic – A Neutrals With Some Oomph

Nothing says romance like a neutral elegant makeup look. To achieve this, go for natural colors with a hint of shimmer and sparkle. Start off by prepping your skin with a lightweight foundation and concealer. Then, grab some warm-toned neutral eyeshadows and apply the lightest shade all over your lids, a neutral in the crease and some warm browns in the outer corner. Be sure to blend them together to create a seamless finish. To add more depth, you can use a very deep brown or even black shade in the outer corners of your eyes. Add a light metallic to your inner corner and finish off with some healthy swoops of mascara. Finally, finish the look with a light rosy blush, soft pink lipgloss, and some highlighter on the cheekbones and bridge of your nose.

Open post

90’s Trends are Back – Starting With Frosted Lipstick

The frosted lipstick trend is back, and its re-emergence has been taking the beauty world by storm, with many celebrities and influencers hopping on the bandwagon. In this blog post, we’ll explore what the frosted lipstick trend is all about, how to wear it, and how even to create your own formula. So if you’ve been wanting to try out the frosted lipstick trend or are just curious about it, read on for all the details!

What is the frosted lipstick trend?

Frosted lipstick is a type of cosmetic product used for lip color and decoration. It is characterized by a metallic sheen or sparkle on the lips, which gives them a frosted or glittery appearance. Frosted lipsticks are often used to add a touch of glamour to a makeup look or to make a statement on special occasions. They come in a variety of shades and finishes, from neutral tones to bright, bold colors.

How did frosted lipstick make its comeback?

We’ve been witnessing hints of ’90s trends over the past year with Hailey Beiber rocking blue eyeshadow and Bella Hadid sporting thin eyebrows. While bushy brows are still very much in, the ’90s resurgence is growing more prominent with the latest trend: frosted lips.

As with most of the beauty trends that we witness these days, this one began to resurface through social media. A couple of major brands released new frosted lipsticks that had influencers raving about them all over the internet. And so, they have begun to fly off the shelves.

How to wear frosted lipstick

Now that everyone is buying the frosted lipsticks, we thought it would be helpful to share some of our pro tips for getting the most out of that sparkly pout. Here are some tips on how to wear frosted lipstick:

  • Keep the rest of your makeup simple: To avoid overloading your look, keep the rest of your makeup simple when wearing frosted lipstick. Opt for neutral or natural tones on your eyes and cheeks to let your lips take center stage.

  • Consider your skin tone: Frosted lipsticks come in a range of shades, so it’s important to choose a color that complements your skin tone. Neutral and pink shades work well for fair skin, while warm, orangey shades suit olive skin, and deep, berry shades are a good choice for dark skin.

  • Apply a base: To help the frosted lipstick last longer, apply a lip primer or balm as a base, and then apply the lipstick with a lip brush for a precise application.

  • Blot and reapply: After applying the frosted lipstick, blot your lips with a tissue and then reapply another layer for a more intense look.

  • Pair with bold eyebrows: To balance the boldness of your frosted lips, consider filling in your eyebrows and making them appear thicker.

  • Experiment with different finishes: Frosted lipsticks come in various finishes, such as shimmery, glittery, or metallic. Experiment with different finishes to find the one that works best for you.

Our Favorite Frosted Lipsticks:

Below are a few of our Colorlab frosted lipsticks:

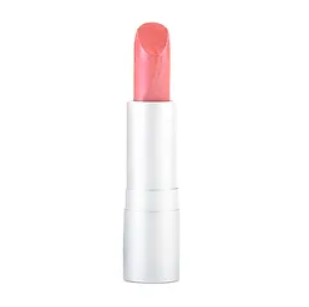
Look of Love

The first of our frosted ready-to-wear lipstick is part of our sheer shiny collection. It is a beautiful pink neutral that offers a subtle metallic sheen. It is also infused with Vitamin E and Jojoba oil for a smooth, hydrating formula.

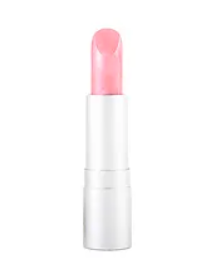
Flower Power

If you like something with a bit more oomph, we also love Flower Power. This lipstick is a lighter, cool-toned pink. It is part of our smooth, creamy collection and also offers a nourishing, hydrating formula for a comfortable wear.

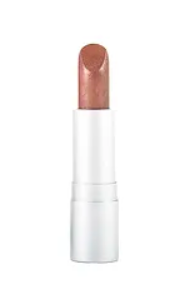
Brown Sugar

For those of you who like a warm brown lip, Brown Sugar is for you. Also a part of our smooth creamy line, this product offers all-day comfort, hydration, and protection.

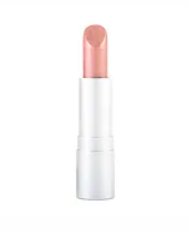
Show Off

Show Off is a great option for those of you looking to try frosted lipstick while still keeping it subtle. This product is a peachy nude with a flirtatious metallic finish.

How to Create Your Own Frosted Lipstick

Want to formulate your own frosted lipstick? Our patented custom blend lipstick system makes it easy.

Try this formula for a warm bronzey metallic lipstick that you will love. Follow us on social media to see the swatches, and watch us make it!

  • Liquid matte base

  • 1 large scoop of champagne frost

  • 1 large scoop of pink gold frost

  • 1 small scoop of pink frost

  • 1 tiny twinkle glitter

  • Cappuccino essence

Open post

What’s the Deal With the Angel Eyes Makeup Trend?

Are you wondering what all the hype is about angel eye makeup? If you’ve been keeping up with the latest beauty trends, you may have noticed that this look has been growing in popularity across social media, and celebrity makeup artists are hinting that it will be all the rage this year. So if you’re wondering what “angel eyes” is all about and how you can re-create it, keep reading to find out.

What is the angel eye trend?

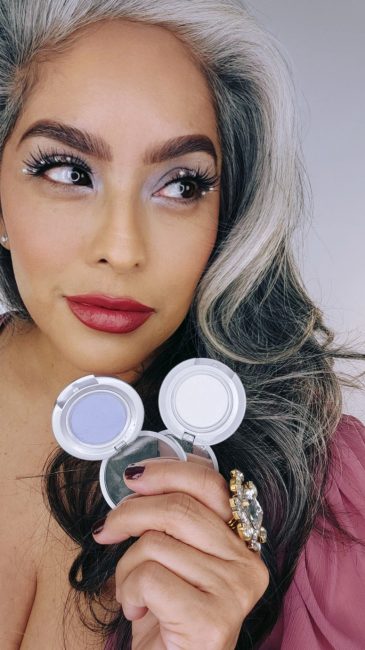
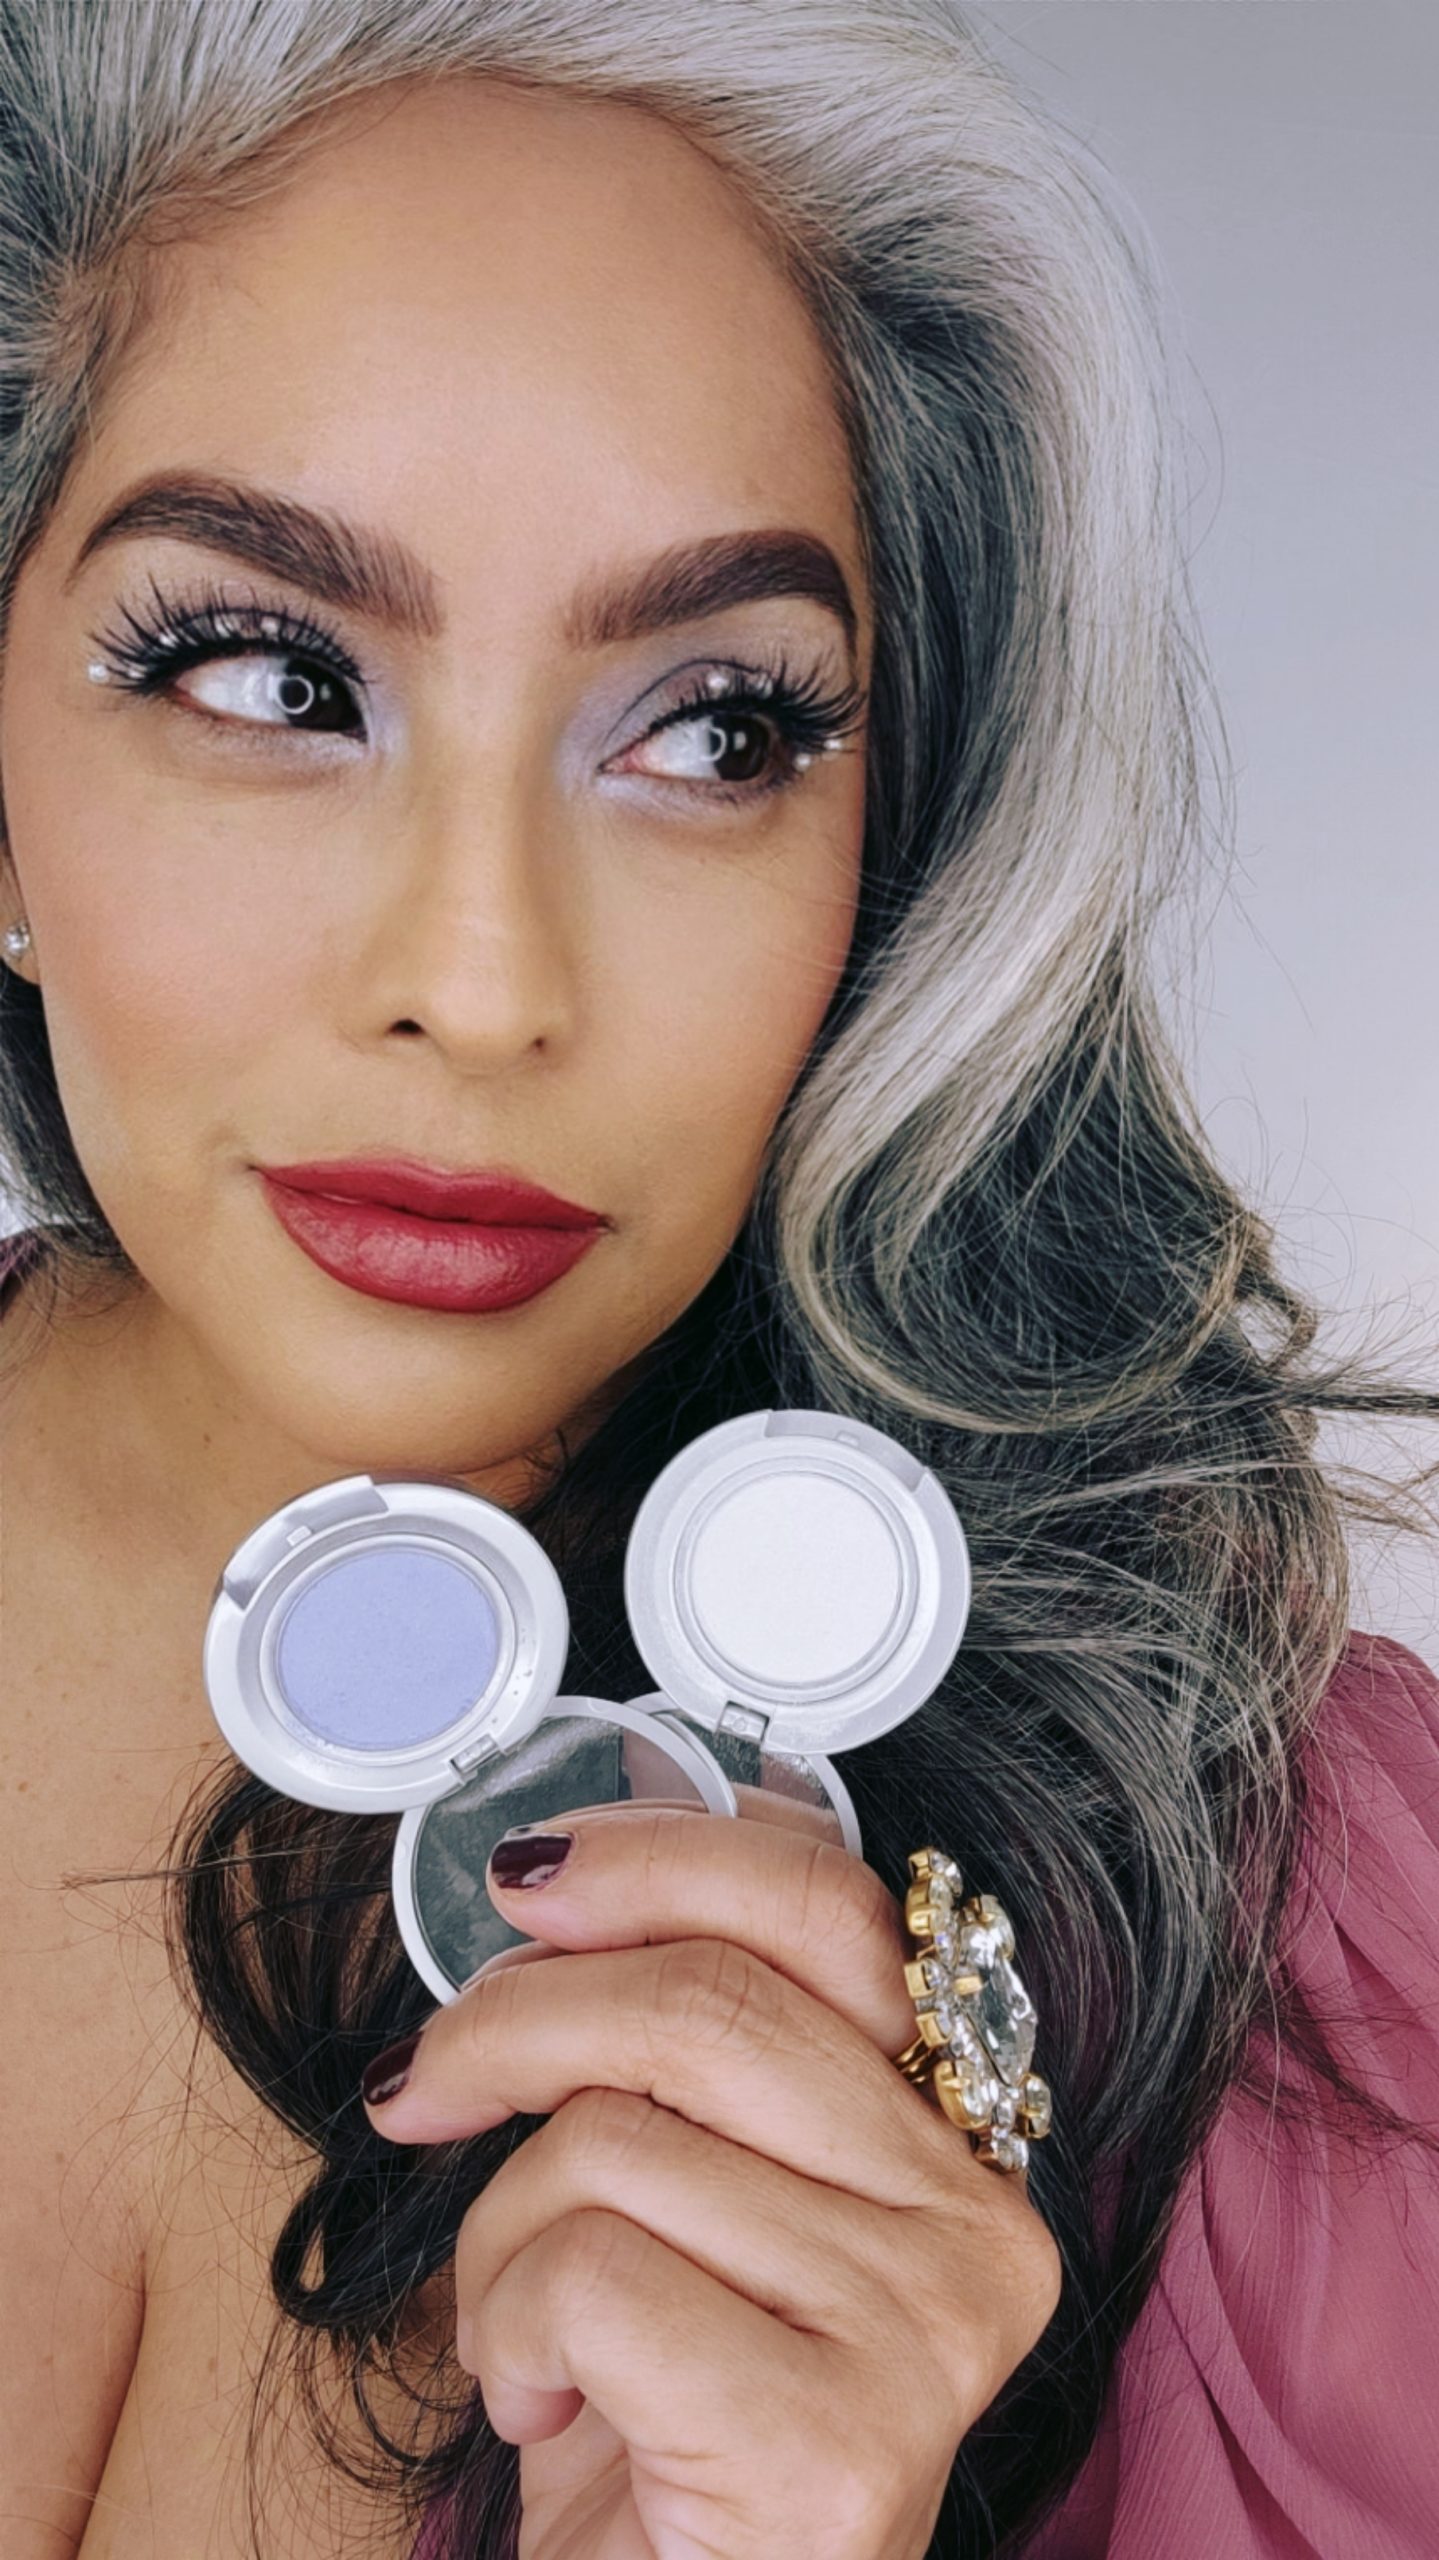
The angel eye trend is a growing makeup trend that was inspired by the ethereal look of angels. This trend involves using a light frosty white eyeshadow across the lid. The white shade in focus creates an angelic, ethereal look and brings a fresh, subtle look to the wearer. To get the perfect angel eye look, make sure to use light and airy eyeshadows that are easy to blend out, rather than heavy or opaque eyeshadows. This look is suitable for all eye shapes and sizes, and can be dressed up or down depending on the occasion.

Origins of the trend

The angel eye makeup trend has been gaining steam lately, with more and more people on social media embracing the look. Celebrities like Dua Lipa have also been spotted sporting this new trend. The style originated in Korea and Japan, but is now being embraced globally. The look itself is quite simple; it involves a light frosty white eyeshadow across the lid, blended around the edges to create a soft, ethereal effect. This look focuses on the white eyeshadow rather than any other colors and is a fresh, modern take on a classic look. The trend has been growing in popularity due to its simplicity, ease of application, and subtle elegance. The angel eye look is perfect for those who are looking for an edgy yet timeless style.

As the trend continues to gain popularity, more variations are being created to include different shades and techniques. Whether it’s done with a full-on eye look or just an accent color, angel eyes are a beautiful way to enhance your look this year.

How to recreate the look

The angel eye makeup trend is a stunning yet simple look that can be easily recreated. It all starts with an eye primer such as our Eyelights primer to create an even canvas and make sure the color is bright and opaque. Then, choose a white eyeshadow in either a frosty or matte finish. Pack the eyeshadow onto the lid using a dense brush, then use lighter neutral shades to blend the edges and soften the look. Finally, add some mascara to your lashes, and you’re ready to rock this look!

Products to use

The key to achieving this look is to choose the right product. Start with a primer like Eyelights Primer in Spotlight to help ensure that your eye shadow lasts all day. Then, select a light white shade. If you’re looking for a shimmery effect, opt for shades like Mother of Pearl, Sugar, or Ice. For a matte finish, White Out is the way to go. If you’re feeling more adventurous, try a loose shadow like Star Shimmer.

How to Custom Blend Your Own

If you’re looking to create your own eyeshadow using our custom blend kit, you can do so with the following formula:

– Liquid Matte Base

– 1/2 tsp of Flawless Finish

– 1 large scoop of Moonlight Pearl Luminescence

– 1 medium scoop of Diamond Dust Frost

– 1 tiny of Opal Frost

– 3 to 4 tinies of Twinkle

Variations on the look

For those looking to add some variety to the angel eyes trend, there are plenty of ways to customize the look. To give it a bit more sparkle, try adding some glitter to the white lid and blending it out with a fluffy brush. This will add depth and dimension to the eye. For a more dramatic look, pair the white eyeshadow with a dark brown or black color around the crease and outer corners of the eye. You can also use colorful eyeliner on the waterline for added vibrancy. If you want to take the look up a notch, opt for a cat-eye shape with a white wing and a white base.

Open post

9 Ways to Use Pinterest to Market Your Beauty Business and Get More Clients

Do you want to use Pinterest marketing to help promote your beauty business and get more clients? If so, then you’re in luck! In this blog post, we will go over 9 effective ways to use Pinterest to market your beauty business and get more clients. By implementing these strategies, you will be able to take advantage of the many benefits that Pinterest has to offer and reach more potential clients. So let’s get started and discover how to use Pinterest marketing to get more clients for your beauty business.

Optimize your Pinterest profile

Having an optimized Pinterest profile is essential for getting more clients for your beauty business. A great profile can help you to stand out from the competition and attract more potential clients. Here are some tips for optimizing your profile:

  • Choose an attractive, professional profile photo that reflects your brand identity.

  • Write a compelling bio that explains who you are, what you do, and why people should trust you.

  • Add your website link to your profile. This will allow people to easily find and access your services.

  • Include keywords in your profile to make it easier for potential customers to find you.

  • Connect your other social media accounts to your Pinterest profile. This will make it easy for people to follow and share your content.

  • If you sell products, create a merchant profile to allow users to shop for your products directly from Pinterest.

Create Pins that Stand out

If you want to use Pinterest to market your beauty business, one of the best ways to do so is to create pins that stand out. Pins are the visual content that drives engagement on Pinterest, and they should be designed in a way that’s eye-catching and memorable.

To create pins that stand out, start by using high-quality images and videos that are relevant to your beauty business. For instance—before and after photos, tutorials, or videos of you working with a client. Vibrant photos and videos are a must—so consider investing in a good camera or using a solid editing app. You should also make sure that your images look great on a variety of devices—including smartphones and tablets.

When it comes to pin design, make sure your pins are visually appealing and branded. Consider including elements like fonts, colors, logos, and branding images to help your pins stand out and be easily recognizable. Additionally, you should consider using templates, graphics, and other visuals to make your pins more attractive.

Finally, write compelling copy for your pins. Your pins should not only look great, but they should also have an effective message that will draw users in and encourage them to take action. Keep your captions short and sweet, and use keywords that will increase your pins’ visibility on Pinterest.

By creating pins that stand out, you can make sure that your beauty business gets noticed on Pinterest—and potentially reach more clients for your business

.

Join relevant group boards

Group boards on Pinterest are an effective way to increase your reach and get more exposure for your beauty business. Group boards are created and managed by a group of people, and they provide an opportunity to collaborate and engage with other members of the group.

When you join relevant group boards, you can share pins from your own content or from other sources. This will help you spread the word about your beauty business, as well as connect with new potential customers.

To find the best group boards for your beauty business, search for keywords related to your industry. Some ideas include “beauty,” “makeup,” “skincare,” and so on. You can also use Pinterest’s ‘Group Board Finder’ tool to quickly locate relevant group boards.

Once you find a group board that’s a good fit for your business, reach out to the board owner with a brief introduction and request to join the board. Make sure to follow the board’s guidelines before posting any pins.

By joining relevant group boards on Pinterest, you can create more exposure for your business and build relationships with other pinners in the beauty industry. This will help you get more clients for your beauty business.

Run contests and giveaways

If you’re looking to get more clients for your beauty business, running contests and giveaways is a great way to engage with potential customers and build relationships with them. Not only will this encourage people to visit your business, but it can also increase your brand visibility and help you gain more followers on social media.

When running a contest or giveaway, it’s important to create an attractive prize that appeals to your target audience. You can also offer discounts or free services in exchange for entering the contest. Make sure to make the rules of the competition clear and easy to understand.

Once you have a prize, create a beautiful pin for the contest and include all the necessary information about it. Include a link to the full details of the contest and be sure to post it across all of your social media channels. Utilize hashtags, ask influencers to share your post, and spread the word about the contest through email marketing. This will ensure more people will know about the competition and potentially enter it.

Finally, make sure to have a system for tracking entries and picking the winner. Once you’ve picked the winner, announce it publicly on your social media channels and contact the winner directly to let them know they’ve won.

By running contests and giveaways, you can increase customer engagement and generate leads for your beauty business. Don’t forget to promote these contests through your social media accounts and other marketing channels to get the most out of them.

Collaborate with relevant influencers

One of the most effective ways to use Pinterest to market your beauty business and get more clients is by collaborating with beauty influencers. By partnering with influencers, you can not only extend your reach but also take advantage of their large audiences. Here’s how you can collaborate with influencers:

  1. Find influencers in your niche (hair, nails, makeup, skincare, etc.): You can use tools like BuzzSumo and Followerwonk to find influencers in your industry. Once you’ve identified some potential influencers, do a bit of research to make sure they have an engaged audience that would be interested in your products or services.

  2. Reach out to them: Reach out to influencers and introduce yourself and your beauty business. Showcase the unique features of your products or services and explain why they should collaborate with you.

  3. Create a collaboration strategy: Develop a strategy with the influencer on how you will work together. Set goals for the collaboration and decide on what content you will create together.

  4. Promote each other’s pins: Once you’ve created content together, share each other’s pins on your Pinterest accounts. This will help you increase your reach and grow both of your audiences.

By leveraging the power of influencers, you can quickly build your brand awareness and grow your business on Pinterest. Collaborating with influencers can be one of the most effective strategies to increase the visibility of your beauty business and get more clients.

Advertise on Pinterest

Advertising on Pinterest can be a great way to reach a large number of potential customers and build brand awareness. With its unique targeting options, you can make sure your ads are seen by the right people.

Pinterest Ads Manager allows you to set up campaigns based on your goals, budget, and target audience. You can choose from promoted pins, video ads, or carousel ads. You can also use their targeting options to narrow down your audience and find people who are more likely to be interested in your beauty business.

Before you start your campaign, it’s important to do some research to understand what type of content works best for your target audience. This will help you create better ads that will get more engagement and help you reach your goals.

Once you have created your ad, you can monitor its performance in the Ad Manager. This is an important step to ensure that your campaign is successful. You should track the impressions, clicks, engagement, and conversions of your ads so that you can make changes if needed.

Advertising on Pinterest can be an effective way to get more clients for your beauty business. By optimizing your profile, creating compelling pins, joining relevant group boards, running contests, collaborating with influencers, and monitoring your results, you can take advantage of this powerful social platform and reach a large audience of potential customers.

Analyze your results

One of the most important steps for any marketing strategy is to track and analyze the results. With Pinterest, you can easily measure your success and adjust your strategy accordingly. Start by measuring how many people are clicking on your pins, which pins they are clicking on, and where they are clicking from. This will give you insight into what types of pins and topics resonate with your target audience.

You can also use analytics tools like Google Analytics to monitor your website’s performance when it comes to Pinterest traffic. This will give you an understanding of the number of visitors your website is receiving from Pinterest, which pins have been shared, and the type of content that is performing best.

Lastly, keep track of the comments and messages you receive in response to your pins and on your boards. This will give you feedback on what your followers think about your content, as well as help you identify potential clients or followers that may be interested in your services. By paying attention to these metrics and taking the time to analyze them, you will be able to continuously improve your Pinterest marketing strategy and get more clients for your beauty business.

Keep your pins updated

In the ever-changing beauty industry, it’s essential to keep your Pinterest pins up to date. This means that you should regularly check in and update your pins with the latest information, images, and products. It’s also important to create new pins regularly to keep your content fresh and engaging.

Start by adding relevant keywords and descriptions to each pin so they will appear in search engine results. You can also use a content calendar to help keep your pins organized and ensure that you are staying on top of regular updates. Additionally, try using seasonal images or colors to draw attention to certain pins throughout the year.

Finally, take advantage of Pinterest’s “Promoted Pins” feature to help spread the word about your beauty business and get more followers. Promoted Pins let you pay to promote your pins, so they reach a larger audience, making it easier for potential customers to find and engage with your content.

By staying on top of your pins and ensuring they are up to date, you can maximize your chances of getting more clients for your beauty business.

Keep experimenting

Experimentation is key to success on Pinterest. You don’t have to stick to one particular method of marketing your beauty business. Try different approaches and see what works for you. You may find that certain pins get more traction than others or that certain topics are more successful than others. Monitor your analytics, test different strategies, and use the data you collect to optimize your approach and maximize your success.

You should also experiment with visuals. Try different colors, font styles, and images and track the results. Change up the type of content you’re creating. Mix up how-to guides, blog posts, customer reviews, video clips, and behind-the-scenes snippets. See what resonates with your audience.

Don’t be afraid to fail and make mistakes along the way. You can learn a lot from your experiments, even if they don’t result in immediate success. Keep testing, analyzing, and adjusting until you find the strategy that works best for your business.

Open post

2022’s Weirdest Beauty Trends That You Can Ditch in 2023

From fork contouring to deodorant primers, the beauty trends of 2022 were certainly unique. However, as we move into 2023, it’s time to give these viral “hacks” a much-needed rest. Whether you’ve tried them yourself (we don’t judge) or were appalled to come across them, we figured it’s time to start the year on a better foot.

In this post, we’ll take a trip down memory lane and discuss the strangest beauty trends of 2022 that were so bad they need to be completely forgotten and ditched in 2023.

Fork Contouring

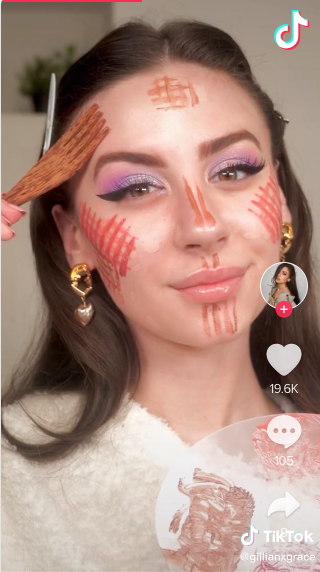
If you didn’t see the fork contouring trend that went viral last year…consider yourself lucky. This trend started as a more effective way to contour your nose and evolved into a way to contour your entire face. Fork contouring involves using the prongs of a fork to create precise patterns on your face for contouring and other makeup looks. Although it looks cool and is certainly creative, it’s definitely not the best method for getting a precise contour.

Let’s put aside the fact that most of us do not keep forks handy in our makeup kits or vanity—we fail to see the advantage of this so-called hack. While this trend certainly had its time, let’s leave it in 2022.

source: Gillian Grace

Glue Blackhead Removal

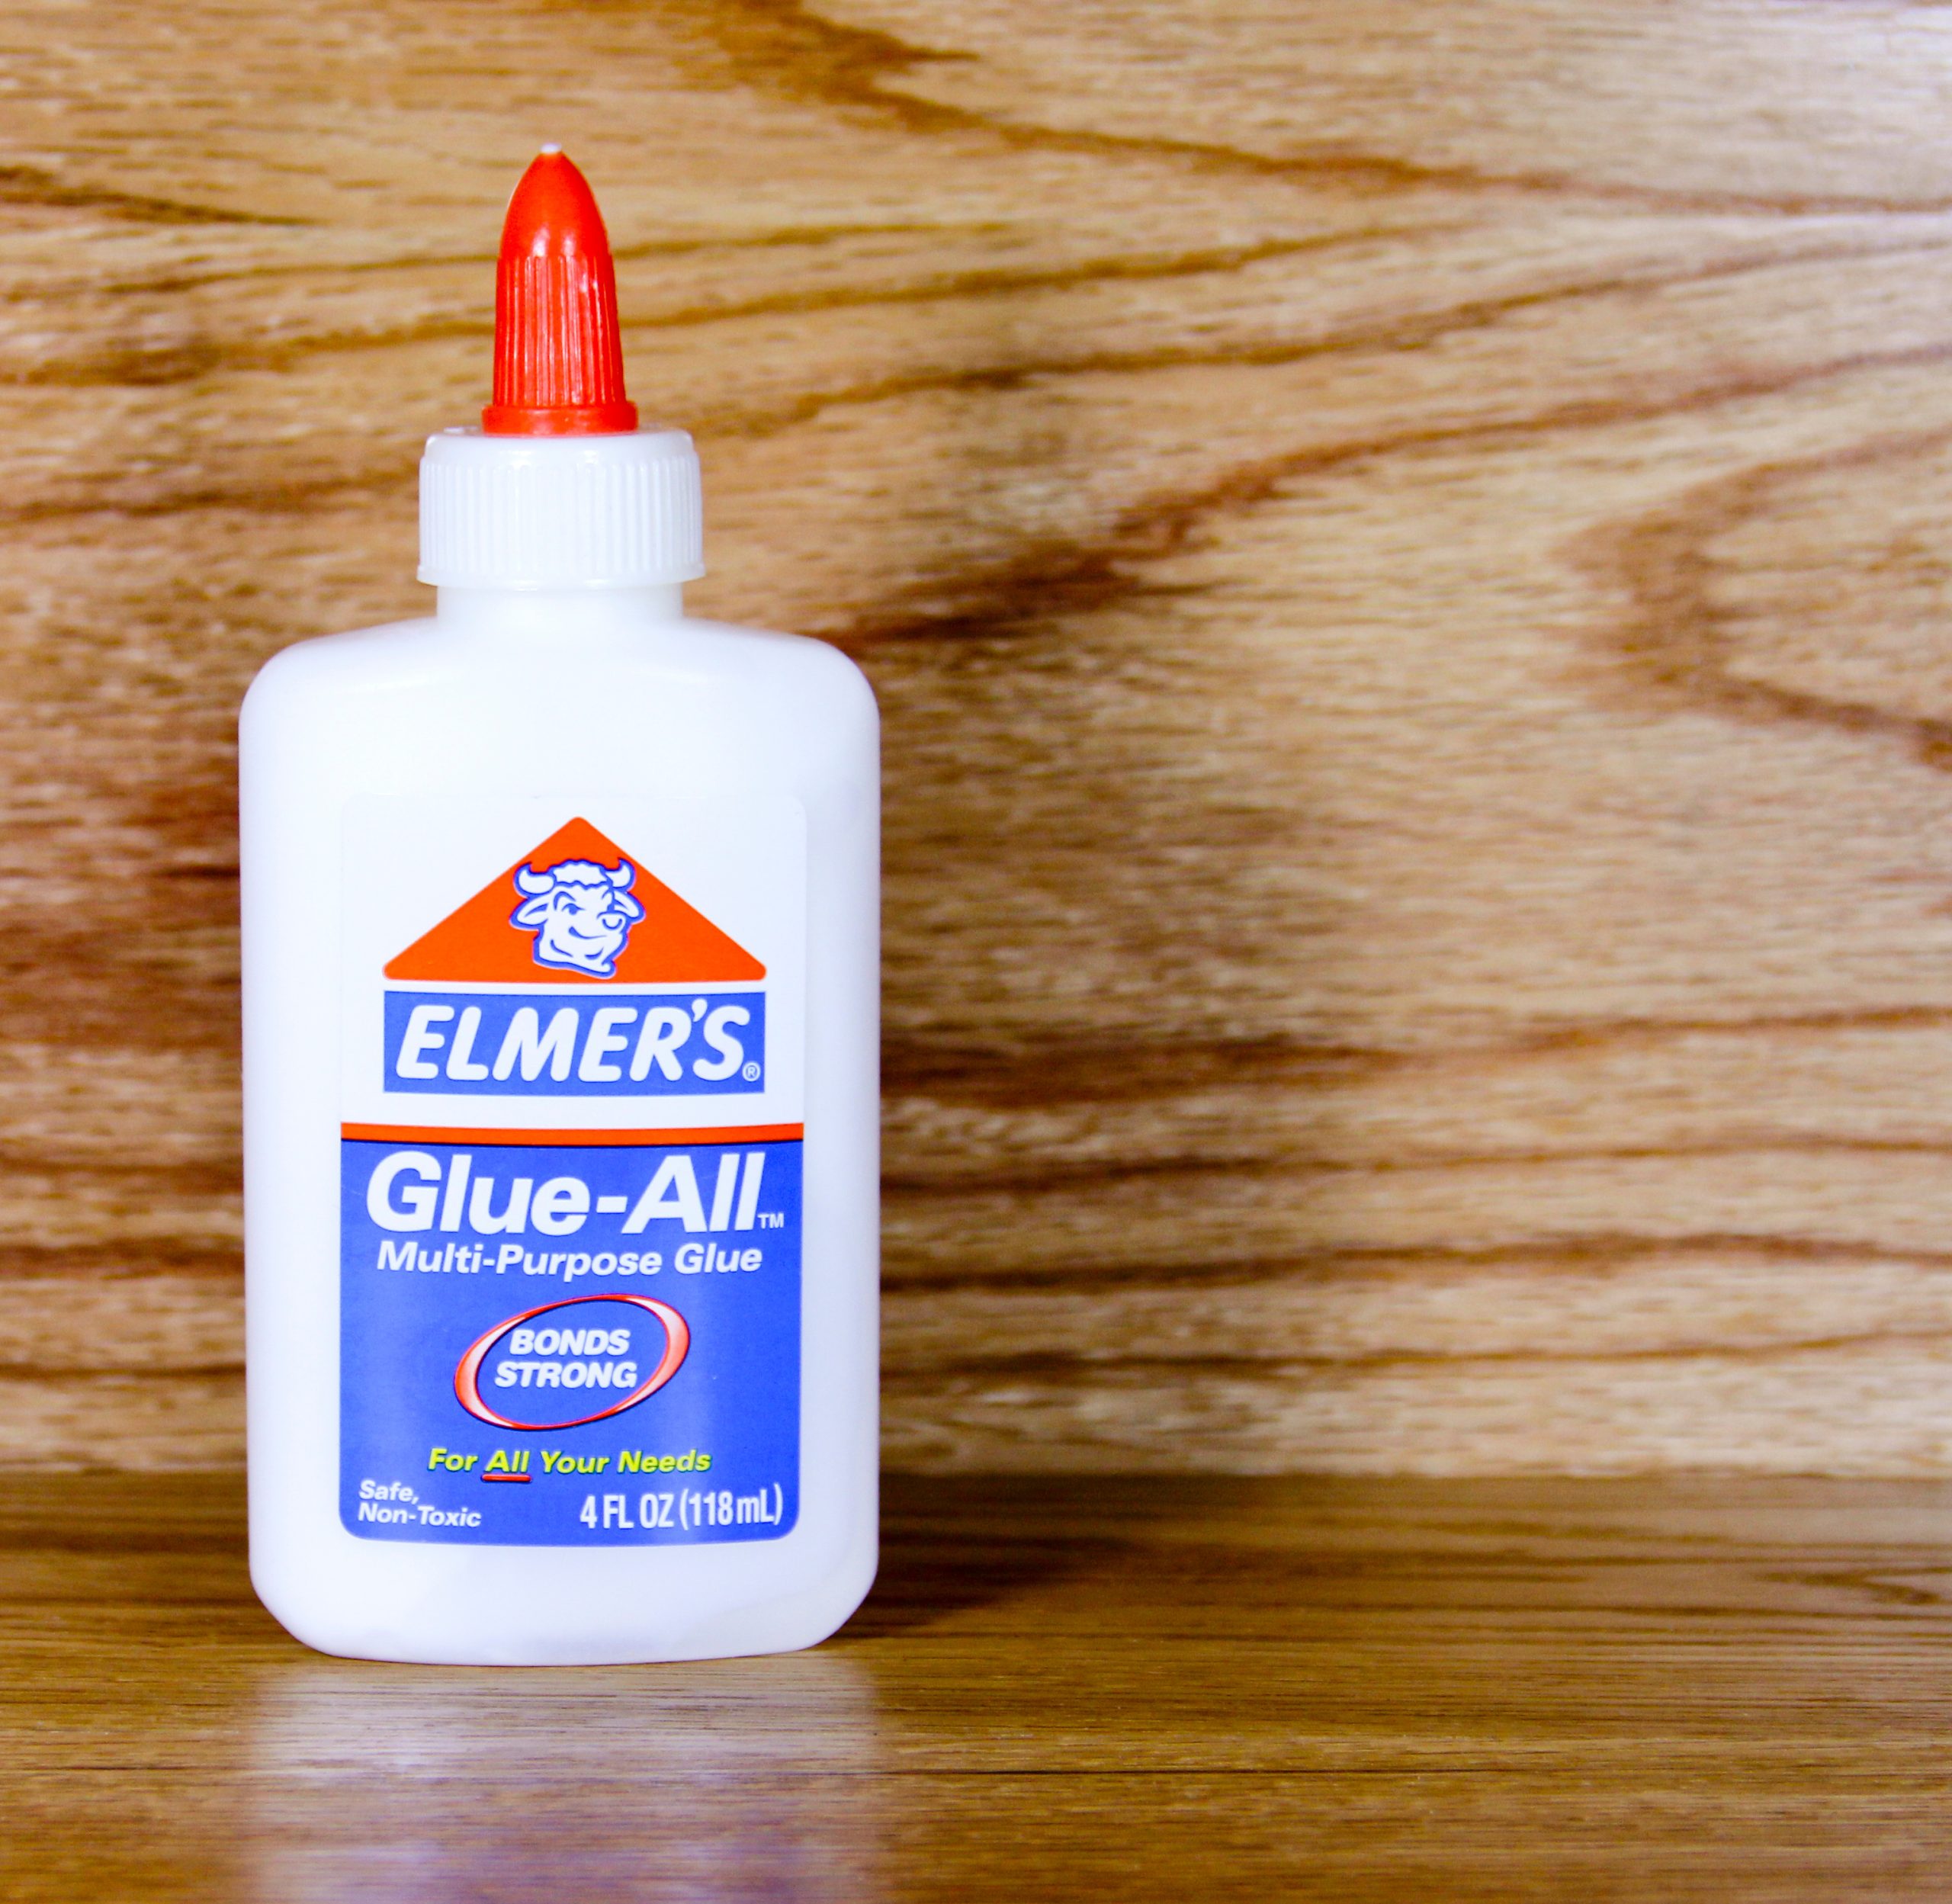
Yes, you read that correctly. Another trend that went viral in 2022 was removing your blackheads with…glue. Need we not explain why this trend should be abandoned this year. Not only is the efficacy of this trend highly questionable, but it also can cause serious damage to the skin by trapping bacteria and other impurities against the face. Furthermore, as this process is incredibly painful, it is easy to damage the delicate skin around the nose and eyes, leading to bruising or discoloration. Not only is glue removal unhygienic and unsafe, it can also strip the skin of its natural oils and dry out the complexion over time. It is definitely a trend to avoid this year and for all of them to follow.

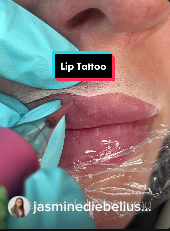
Lip Tattoos

DIY lip tattoos were another strange beauty trend that came about in 2022. This trend involved tattooing color or lip liner on your lips to give them a permanently plumper or more striking look. As we learned from the tattoo eyebrows and tattoo eyeliner hype—trends come and go, and if you decide you want to remove the liner, you may be in for a painful awakening.

Not only is this trend one that’s likely to fade on its own, but there are many potential risks associated with attempting to do this procedure at home, as there is no control over what type of ink is used or how deep it is applied to the skin. Therefore, it is highly recommended that you avoid trying this method at home and leave it to the professionals!

source: Jasminediebelius

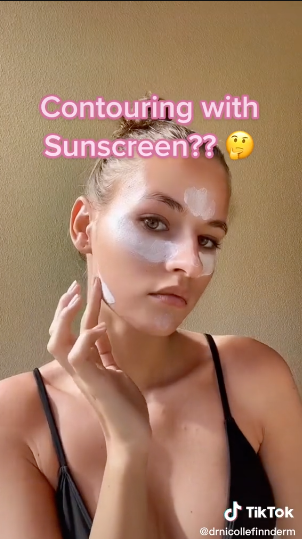
Sunscreen Contouring

Sunscreen contouring was another trend created to achieve a lasting contour to your face. The way it works—apply sunscreen to the places of your face that you would not contour and leave the other spots bare, and then lie in the sun. Some videos even suggest adding tanning oil to the contour locations—eeeeek!

It all started with Gwyneth Paltrow showing her sunscreen routine, where she only applies sunscreen to the points of her face where “the sun really hits.” And so the monster of sunscreen contouring was born.

We probably don’t even need to explain the dangers of doing this. Not wearing enough protection can increase the risk of skin cancer and/or premature aging from UV damage. Plus, depending on what type of sunscreen is used and how often it needs to be reapplied, your contour lines will end up being anything but consistent. In addition, relying on the sun for beauty is always a big no-no. So if you’re looking for an effective and safe contouring method for 2023, we’d definitely advise skipping this one altogether.

Source: Nicolle Finn Derm

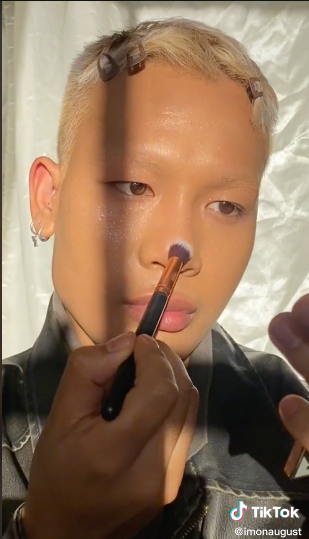
Highlighter All Over the Face

Highlighter all over the face or “vampire skin” was another one of TikTok’s finest fails of 2022. This look, as its name implies, involves slathering highlighter across every inch of your face, leaving you with a mirror-like glow – and not a very natural one at that! While it certainly made for some striking Instagram photos, it simply looks too overdone and unnatural in real life. Not to mention it does not wear well over the course of the day as you mix it with sebum and sweat. In the age of minimal makeup, this trend is best left behind and replaced with more subtle forms of highlighting, such as cheekbone sculpting and a light dusting on your cupid’s bow. Try adding a little bit of blush and bronzer for an even more flattering look, and leave your skin’s natural beauty to shine through.

Source: imonaugust

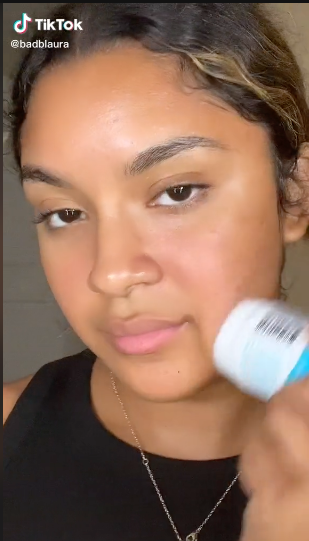
Deodorant Primer

Priming your face with Deodorant was another viral hack in 2022. The claim is that it keeps your makeup on all day and gives it a flawless finish. As you can imagine, this one made the list of the worst TikTok Trends of 2022. Deodorant contains many contain harsh chemicals that could leave skin dry and irritated. Additionally, as deodorant also contains antiperspirants, it could potentially block pores and lead to breakouts. So, when it comes to prepping your face for makeup, always use a moisturizer or facial primer specially formulated for the delicate skin of your face instead of deodorant.

Source: badblaura

Clumpy Lashes

Thanks to a handful of popular social media influencers, the idea of layering your lashes with 10+ coats of mascara was something else that took off last year. Though it gave you a voluminous look, it looks very unnatural in person. It also makes it harder for people to remove their mascara without taking their real eyelashes out as well!

That’s why we recommend ditching this trend in 2023 and going back to only two coats of lash lengthening and volumizing mascaras. With this technique, you can still get incredible length and volume, but you won’t be left with messy clumps or worse – no eyelashes at all! Not only will this be more gentle on your eyes, but it’ll also help you avoid unnecessary damage to your delicate eye area.

Photo by TOMMY VAN KESSEL on Unsplash

Snail Facials

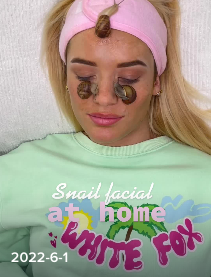
Yes, you read that right. Snail facials were all the rage in 2022. This involved putting live snails on your face and letting their excretions deliver promised benefits to your skin. But if you don’t happen to have a swarm of snails living in your garden, fear not. This is another one we can leave behind.

There have been some reports that snail extract can help reduce redness and puffiness, so there may be some merit to the trend in terms of benefits for the skin. However, it is important to keep in mind that this is not yet clinically validated. And if you are wanting to give it a try, dare we say you’re better off buying snail extract products rather than using live snails?

Source: tillywhitfield

Closing Thoughts

As we look ahead to 2023, it’s time to leave behind some of the worst beauty trends of 2022. We’ve discussed fork contouring, glue blackhead removal, DIY lip tattoos, sunscreen contouring, highlighter all over the face, deodorant primer, clumpy lashes, and snail facials – all trends that are best left in the past.

Instead of trying these potentially dangerous or uncomfortable trends, let’s stick to the tried-and-true methods that have been around for years.

Posts navigation

1 2 3 4 5
Scroll to top