Open post

Metallic Marvels: How to Shine in This Year’s Makeup Trend

In the ever-evolving world of beauty, metallic makeup is shining brighter than ever as one of the most captivating trends of the year. Whether you’re a makeup novice or a seasoned beauty guru, there’s a radiant realm of possibility awaiting you in the sparkle of metallics. This shimmering trend is not just for the red carpets or runway models; it’s remarkably versatile and adaptable, making it perfect for anyone looking to infuse some glam into their everyday look.

As we collectively transition into a post-lockdown reality, people are seizing the opportunity to express themselves, and what better way than through the art of makeup? Metallics offer a range of applications—from a subtle golden highlight that catches the sun to a bold, chrome-like eyeshadow that promises to turn heads. And if you’re hesitant about diving all in, there are simpler ways to test the waters, like a metallic nail polish or a hint of shimmer on your lips.

From the elegant fashion houses in Paris to the gritty, rebellious characters on the TV show “Euphoria,” metallic makeup is making waves and setting new standards in beauty. Ready to glisten like never before? Read on to discover how you can incorporate this dazzling trend into your beauty routine, no matter your style or comfort level.

https://www.instagram.com/p/CmwLBk3Lln5/

The Rise of Chrome and Metallics

If you’ve been keeping an eye on the pulse of fashion and beauty, you’ll have noticed that metallics are no longer just for statement jewelry or chic handbags; they’ve boldly claimed a spot in the makeup world. With the close of 2022’s Paris Fashion Week and the release of the latest season of “Euphoria,” the message is loud and clear: metallic makeup is not just a passing fad, but rather a full-blown sensation that shows no signs of waning.

Hollywood and High Fashion

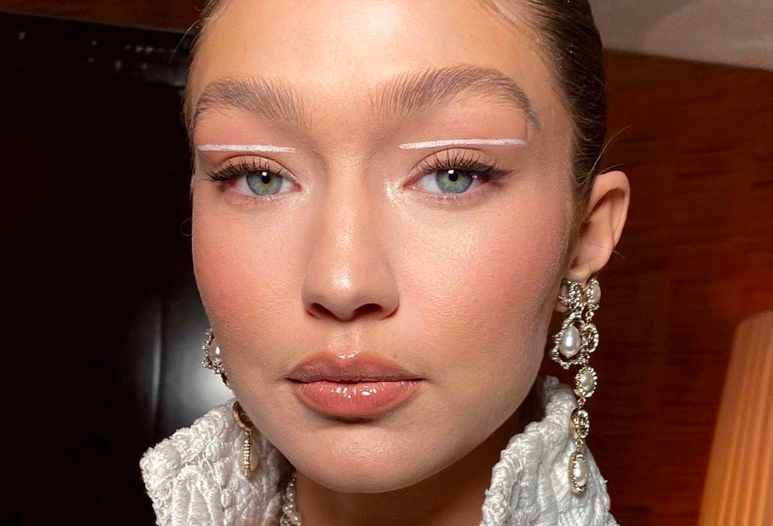
Dior’s Fall 2022 runway at Paris Fashion Week was nothing short of a tribute to fierce femininity, featuring models adorned in matte nude eyeshadow bases with striking metallic accents. Peter Phillips, Dior’s creative and image director, couldn’t have made a bolder statement than with the flash of metallic silver adorning the eyes of the runway models. And Dior wasn’t alone. Brands like Vaquera, Bronx, and Banco also gave nods to metallics, lighting up the runway with shades of silver.

Pop Culture Influence

The influence of TV shows can’t be understated, and “Euphoria” has certainly done its part to popularize complex, high-shine eye looks. Characters in the series are often seen flaunting metallic eyeshadows that reflect a mirror-like shine, inspiring viewers to recreate these glamorous looks. It’s not just a trend; it’s a form of self-expression that’s resonating deeply with audiences.

Versatility and Inclusivity

What sets metallic makeup apart is its versatility. Whether you’re going for a subtle glow or making a bold statement, there’s a metallic shade and product for you.

Everyday Glamour

While metallics have been dazzling on high-fashion runways and TV screens, they’re equally captivating in everyday settings. Whether it’s a touch of metallic eyeliner for a night out or a shimmery highlight for a brunch date, metallic makeup offers a range of options for those looking to elevate their daily look.

The Versatility of Metallics

We all know that the makeup universe is always evolving, unveiling new trends that challenge us to step outside our comfort zones. One such trend that has effortlessly transitioned from the high fashion runways to everyday glam is metallic makeup. This shining star of the makeup world is as versatile as it is stunning. Whether you want a glitzy night-out look or a subtle daytime shimmer, metallics have got you covered.

The All-Inclusive Palette: Skin

For those who love a subtle glow, metallic highlighters like our pressed luminizers are your new best friends. Whether you desire a softer shimmer or an intense metallic finish, a quick swipe on your cheekbones, nose bridge, and cupid’s bow will instantly elevate your look.

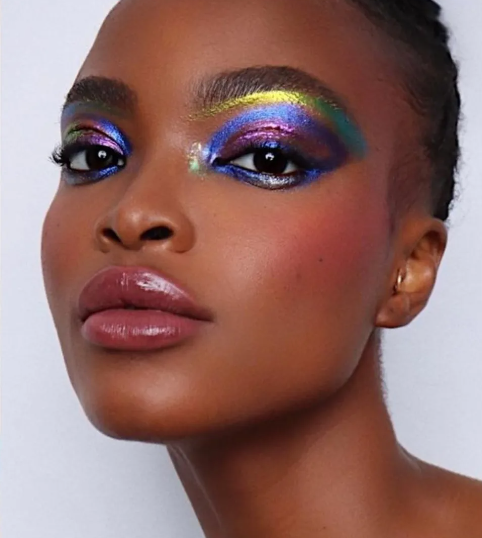
The Canvas of Creativity: Eyes

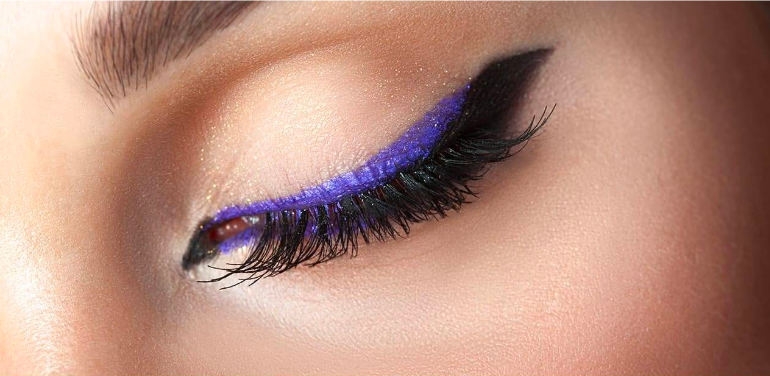
The eyes are where metallics can truly shine (pun intended). If you’re looking for an everyday application, neutral metallic shades can add depth and interest to your eyes without overwhelming your look. For a more daring approach, vibrant shades and glitters will certainly turn heads.

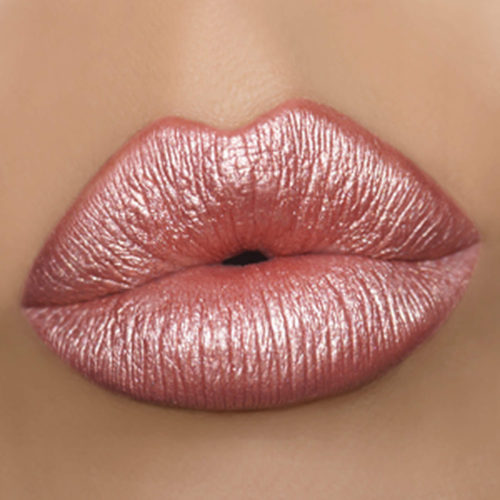
A Dash of Drama: Lips

Think metallics on lips are too intense? Think again! Metallic lip finishes can add depth and dimension, giving you fuller-looking lips. You can opt for subdued shades for a more traditional look or go bold with brighter colors. The key is to find a shade that complements your overall look and mood.

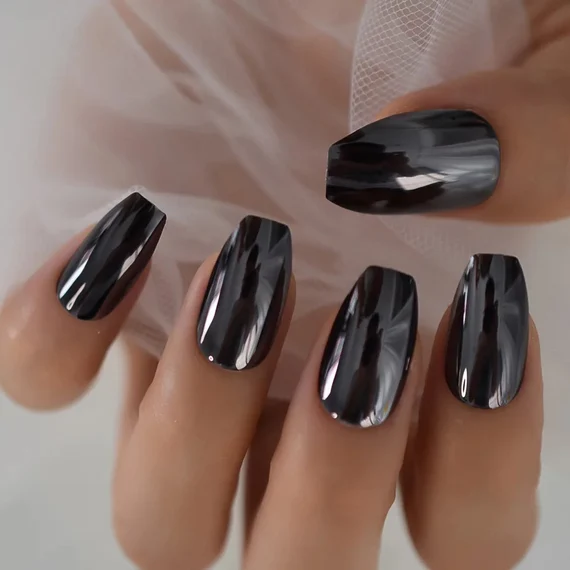
A Polished Approach: Nails

If you’re still testing the metallic waters, a metallic nail polish is the perfect start. With a shade like “All That Glitters is Not Gold” or “Moving Metal” you get a chic finish that complements any outfit and any occasion. It’s a non-intimidating way to incorporate metallics into your beauty routine.

Get Inspired: Fashion and Pop Culture

Let’s not forget the influence of fashion weeks and popular shows like “Euphoria,” which have been pivotal in bringing metallic makeup to the forefront. Whether it’s Dior’s vision of fierce femininity or the complex eye looks from “Euphoria,” these platforms serve as great inspiration for your metallic makeup journey.

Nailing the Metallic Look: Tips for Your Nails

When it comes to dipping your toes (or, more accurately, your fingers) into the world of metallics, nails are an excellent starting point. The beauty of metallic nails is that they work for every occasion, adding a touch of glamour to your everyday look or serving as the finishing touch for a special event. Here’s how you can master the metallic look on your nails, courtesy of Colorlab’s versatile range.

Choose the Right Shade

Picking the perfect shade can be overwhelming, but the key is to consider your skin tone and the types of outfits you frequently wear. Opt for a metallic hue that complements both. Colorlab offers a range of metallic nail polish shades suitable for all skin tones, ensuring you’ll find your perfect match.

Prep Your Nails

Before you start, make sure your nails are clean, shaped, and buffed. A well-prepared canvas ensures that your metallic nail polish will adhere better and last longer. Colorlab’s nail prep solutions can help you achieve salon-like results right at home.

Layering is Key

Start with a base coat to protect your nails and enhance the polish’s longevity. Once it’s dry, apply your chosen metallic shade from Colorlab. A second coat can intensify the color and metallic finish. Finish off with a top coat to seal in the shine and prevent chipping.

Experiment with Nail Art

Feeling creative? Metallics make an excellent choice for nail art designs. Use contrasting shades from Colorlab’s collection to create stripes, dots, or even intricate patterns. You could also use metallics for the tips in a French manicure for a modern twist.

Maintenance

To keep your metallic nails looking fresh, try to avoid activities that are especially hard on your hands like dishwashing or gardening without gloves. If you notice any chips, use Colorlab’s top coat to seal them until you can do a full touch-up.

Get That Glow: Metallics for Your Skin

Radiant, glowing skin never goes out of style, and adding a touch of metallic sheen can elevate your look to new shimmering heights. Here’s how you can achieve that coveted metallic glow using Colorlab’s line of skin-focused products.

Start with a Good Base

Healthy, well-moisturized skin is the best base for any makeup application, especially when you’re aiming for a metallic finish. Apply a light layer of Colorlab’s hydrating primer to prep your skin. This will give your metallic products something to adhere to and ensure longevity.

Choose the Right Highlighter

The key to achieving that perfect metallic glow is choosing the right highlighter shade. Colorlab offers a wide variety of shades, suitable for every skin tone. Whether you’re aiming for a golden radiance or a rosy shimmer, you’re covered.

Placement is Everything

When applying your metallic highlighter, focus on the high points of your face where the light naturally hits—like your cheekbones, brow bones, and the bridge of your nose. For added dimension, you can also apply a bit to the cupid’s bow above your lip.

Layer Wisely

Metallics can be bold, but they can also be subtle. For a low-key daytime look, a single swipe of Colorlab’s metallic highlighter will suffice. When the sun goes down and you’re looking to amp things up, feel free to layer for a more intense glow.

Blend, Blend, Blend

The secret to any great makeup look is blending. Use a makeup sponge or a dedicated highlighter brush to blend the product into your skin. Colorlab’s makeup tools are designed for this very purpose, ensuring a seamless application.

Go Beyond the Face

Don’t limit your metallic glow to just your face. A bit of highlighter on your collarbones or shoulders can add a touch of glamour to your evening look.

Lock It In

Once you’re happy with your look, set everything in place with Colorlab’s setting spray. It will keep your metallic glow intact, allowing you to shine throughout the day or night.

Eye-Catching Elegance: Metallics for Your Eyes

When it comes to making a statement with your makeup, your eyes are often the first thing people notice. Incorporating metallics into your eye makeup can transform your look from simple to show-stopping. Here’s how to create eye-catching elegance using Colorlab’s range of metallic eye products.

https://www.instagram.com/p/Cfqla7ToGYN/

Prepare Your Canvas

To make the most of your metallics, start with a smooth, even base. Use Colorlab’s eye primer to ensure your shadows adhere well and last all day long. This will also help to intensify the colors and metallic sheen of the eyeshadows.

Select Your Shades

Colorlab offers a rich palette of metallic eye shadows suitable for all occasions. Whether you want to go bold with jewel tones or keep it subdued with earthy hues, you’ll find something that aligns with your vision.
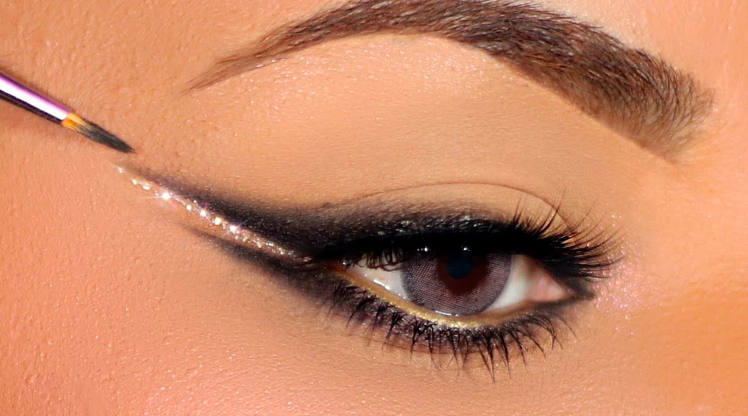
Technique Matters

For a soft, diffused look, use a fluffy eyeshadow brush to sweep the metallic shadow across your lids. For a more intense, foiled effect, apply the shadow with a damp, flat brush. This technique enhances the metallic sheen, making your eyes truly pop.

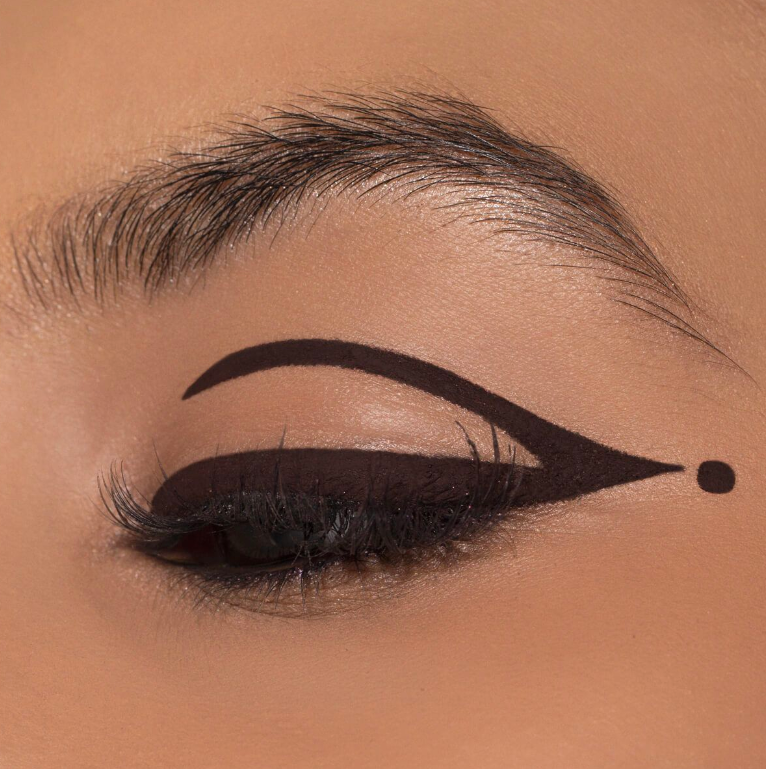
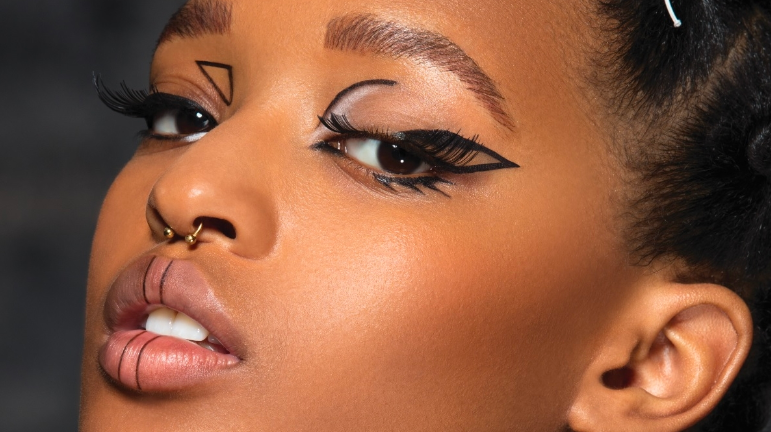
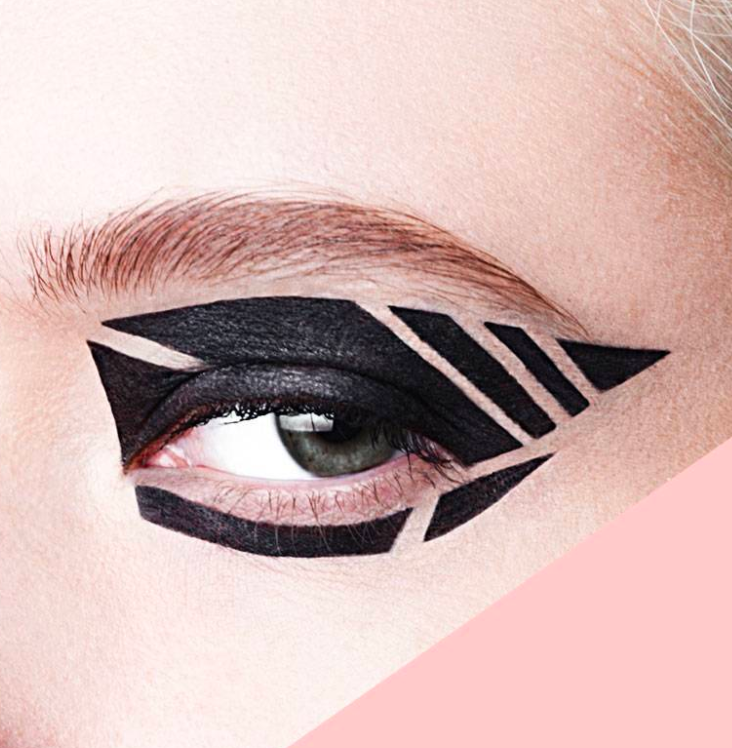
Play with Shapes and Lines

Metallics lend themselves well to experimentation. Consider using Colorlab’s metallic eyeliner for a more defined look, or even for some graphic eye art. Whether you opt for a classic cat-eye or something more avant-garde, metallics can add that extra edge.

Accentuate Your Inner Corner

A tiny dab of a lighter metallic shade in the inner corners of your eyes can instantly brighten your entire look. This simple touch can make your eyes appear larger and more awake.

Don’t Forget Your Lower Lash Line

For a cohesive look, lightly sweep some metallic shadow along your lower lash line. This creates balance and brings the look together.

Seal the Deal

To lock in your eye-catching masterpiece, finish off with a couple of coats of Colorlab’s long-lasting mascara. This will add volume and length to your lashes, perfectly complementing your metallic eye look.

Luscious Lips: The Metallic Pout

If you’re looking to elevate your lip game, look no further than metallic lip products from Colorlab. A metallic finish can provide a luxe, multidimensional sheen that catches the light and adds fullness and drama to your pout. Here’s how to achieve luscious, metallic lips that are sure to turn heads.

Start with a Clean Base

Just like with any lip application, you’ll want to begin with clean, well-moisturized lips. Use Colorlab’s lip exfoliator to remove any flakiness and apply a hydrating balm to keep your lips smooth.

Choose Your Shade

Metallic lip products come in a range of shades, from subtle nudes to vibrant reds and even bold purples. Choose a shade that complements your skin tone and fits the occasion.

Outline for Precision

Before applying your metallic lip color, outline your lips with a lip liner that matches your chosen shade. This not only gives your lips a more defined shape but also helps prevent the color from feathering.

Apply the Color

Use a lip brush for more precise application, and coat your lips evenly with your selected Colorlab metallic lip product. Whether you choose a metallic lipstick or a gloss, the color will glide smoothly, providing rich pigment with a radiant finish.

Add Some Ombre

For a more sophisticated look, consider creating an ombre effect by applying a slightly darker or lighter metallic shade at the center of your lips. Blend it outwards into your base color for a gradient that adds depth and dimension.

Lock it in

Ensure your luscious lips last all day or night by setting them with Colorlab’s lip setting spray. A quick spritz will seal in the color, ensuring your metallic pout stays put.

Optional: Top it Off with Gloss

For an extra layer of shine and volume, consider topping off your metallic lips with a clear or matching glossy topcoat. This will take your luscious, metallic pout to the next level.

Additional Techniques and Tips

While the aforementioned methods offer a great starting point for diving into the world of metallic makeup, there are also some additional techniques and tips that can help you master this glamorous look. Here are some pro tips to get you glowing, sparkling, and turning heads with Colorlab’s range of metallic products:

Layering is Your Friend

For an even more dazzling effect, consider layering different types of metallic products. For example, apply a base layer of metallic lipstick and then layer a metallic gloss on top for a richer, more dynamic sheen.

Use Primer for Longevity

Whether it’s your eyelids, lips, or face, always start your makeup routine with a good primer. Colorlab offers a range of primers that can help prepare your skin for metallic makeup, ensuring that it adheres better and lasts longer.

Play with Textures

Metallics come in various forms, including powders, creams, and liquids. Don’t be afraid to mix and match different textures for a unique, multi-faceted look.

Mix Metallics with Mattes

While a full-metallic look is absolutely striking, mixing metallics with mattes can add a sophisticated touch. For instance, a matte eyeshadow in the crease with a metallic shade on the lid creates depth and draws attention to your eyes.

Experiment with Highlighting

Use a metallic highlighter to bring attention to high points on your face like your cheekbones, brow bones, and the bridge of your nose. This adds a subtle glow that complements your other metallic features.

Keep it Balanced

While metallics are fun and attention-grabbing, you don’t want to overdo it. If you’re going for bold metallic eyes, consider a more subdued lip, and vice versa.

Don’t Forget the Setting Spray

After you’ve completed your dazzling metallic look, make sure to set everything with a setting spray. Not only does this add longevity to your makeup, but many setting sprays also offer a luminous finish that complements metallic features.

Conclusion

Metallic makeup is more than just a trend; it’s a versatile way to elevate your everyday look or make a stunning statement for a special occasion. Whether it’s a subtle metallic sheen on your nails or a full-blown chrome extravaganza on your eyes and lips, there’s a metallic look for everyone.

With Colorlab’s extensive range of metallic beauty products, you have everything you need to shine like the star you are. Our high-quality formulations ensure not only dazzling pigmentation but also long-lasting wear, giving you the freedom to shine from morning till night.

The world is slowly opening up again, and as we step back into normalcy, why not do it with a little extra sparkle? After all, life is too short for boring makeup. So go ahead, explore the realm of metallics, and don’t just follow the trend—set it!

Thank you for joining us on this radiant journey through the world of metallic makeup. We can’t wait to see how you make this trend your own with Colorlab products.

Happy glowing!

Open post

How to Wear Lip Stains for a “Less is More” Look

In a world increasingly embracing the beauty of simplicity, the ‘Less is More’ aesthetic is more relevant than ever. Gone are the days when heavy layers of makeup were the only route to a captivating look. Today, it’s all about letting your natural beauty shine through—enhanced, not overshadowed, by the makeup you wear. And what could be a more fitting addition to this minimalist beauty trend than Colorlab’s long-lasting, blendable lip and cheek stains? Designed for the modern person who seeks versatility and longevity in her beauty products, our stains provide that delicate splash of color that stays put, while allowing you the freedom to look as natural or as vibrant as you like. Let’s delve into the world of lip and cheek stains, explore their benefits, and reveal the different looks you can achieve with this one magical product.

photo credit: @taylorhill

Benefits of Using Lip and Cheek Stains

If you’ve ever faced the conundrum of wanting to add a pop of color to your lips or cheeks but dread the feel of heavy makeup, then lip and cheek stains are your dream come true. Here’s why:

  • Long-Lasting: One of the greatest advantages of using Colorlab’s lip and cheek stains is their staying power. Unlike traditional lipsticks or blushes that may require frequent touch-ups, our stains stay put for hours, allowing you to go about your day without a second thought about your makeup.

  • Blendable: The blendable nature of these stains offers you the ultimate control over the intensity of your look. Whether you want just a whisper of color or a more vibrant hue, you can easily achieve it by layering and blending the product.

  • Versatile: Why carry around separate products for your lips and cheeks when one can do the job of both? The multi-use aspect of Colorlab’s lip and cheek stains makes them a must-have in any minimalist beauty arsenal.

  • Low Maintenance: If you’re someone who prefers a straightforward, low-maintenance beauty routine, these stains are a godsend. Simply dab a small amount onto your lips or cheeks, blend as desired, and you’re good to go.

  • Under-Layer Magic: Want to level up your lipstick game? These stains serve as a fantastic base, ensuring that your lipstick’s color remains vivid even as it starts to fade throughout the day. They can also be mixed with gloss for a personalized, long-lasting look.

How to Achieve a Natural Look with Colorlab Lip and Cheek Stains

The minimalist ‘Less is More’ mantra truly shines when it comes to achieving a natural look. Here’s how you can master the art of subtlety with Colorlab’s lip and cheek stains:

  1. Preparation: Start by prepping your skin with a lightweight moisturizer and primer to create a smooth canvas for makeup application.

  2. Base Makeup: Apply your favorite foundation or BB cream for a light, even skin tone. Use concealer only where needed to let your natural skin shine through.

  3. Cheek Stain: Dab a small amount of Colorlab lip and cheek stain onto the apples of your cheeks. The trick is to use sparingly; you can always add more. Blend the color outward and upward using your fingertips or a blending sponge.

  4. Lip Stain: Apply a light coat of the same stain on your lips, starting from the center and moving outward. For a more blended look, you can use your fingertip to tap and spread the color.

  5. Layer if Needed: If you desire a bit more vibrancy, simply layer on a second coat of the stain on both your cheeks and lips. Remember, the beauty of this product is in its blendability; layering won’t make it look cakey.

  6. Final Touches: To complete your natural look, opt for a coat of mascara and perhaps a swipe of a neutral eyeshadow. Skip the eyeliner for this look to keep things simple and fresh.

https://www.instagram.com/p/CwLs2jZh-MO/

Achieving Different Looks with Lip and Cheek Stains

While the versatility of lip and cheek stains is often understated, these multitaskers are like the Swiss army knives of the beauty world. From a soft, everyday glow to bold, statement-making hues, they can do it all. In this section, we will explore various ways you can use Colorlab’s long-lasting and blendable lip and cheek stains to achieve diverse looks. Whether you’re going for a subtle flush or a more vibrant statement, we have the tips to get you there effortlessly.

The “Barely-There” Beauty

This look is all about subtlety, and it’s perfect for those days when you want to embrace your natural beauty. Using Colorlab’s lip and cheek stains, apply a single light layer to your lips. Dab a small amount on your cheeks and blend it out for a delicate blush that makes you look radiant but not overly done. The beauty of this look is that it’s so natural, people will wonder if you’re naturally this gorgeous. (Hint: you are, but now you’ve enhanced it!)

https://www.instagram.com/p/CSXaXmelS-X/

The “Sun-Kissed Glow”

Dreaming of that just-back-from-the-beach look? The “Sun-Kissed Glow” is all about achieving that healthy, fresh-off-a-vacation vibe. Apply a deeper or warmer shade of the lip and cheek stain to both your lips and the apples of your cheeks, then blend it up toward your temples. This creates a sun-kissed, radiant complexion that screams summer, regardless of the season.

https://www.instagram.com/p/Cuxkvubvz0j/

The “Night Out”

Ready to make a statement without saying a word? The “Night Out” look lets you do just that.
Keep it simple but glamorous. Start by applying two layers of your chosen lip and cheek stain to your lips for maximum intensity. Then, take a darker or bolder shade and apply it to your cheeks. Nighttime looks can be a bit more dramatic so feel free to play up other aspects of the look.

https://www.instagram.com/p/CjvoXUcqxHR/

The “Fresh-Faced” Look

Looking for that youthful, “I woke up like this” look? The “Fresh-Faced” style is your go-to. Choose a shade that closely matches your natural lip color for a soft, understated effect on your lips. Then, apply a rosy or peachy shade to the apples of your cheeks, blending it out for a subtle but youthful flush. This look is perfect for day-to-day activities and gives you that radiant, fresh-faced appearance we all crave.

Versatility: More Than Just a Lip Product

One of the most impressive things about Colorlab’s lip and cheek stains is their incredible versatility. While the name might suggest that they’re primarily for your lips, these powerhouse products can be applied in a variety of ways to enhance your entire look. Here’s how:

  • Eyeshadow Base: For a pop of color on your eyelids that stays put, apply a thin layer of the stain before layering on your regular eyeshadow. Not only does it add depth to your eye makeup, but it also helps the shadow to adhere better and last longer.

  • Blush: As we’ve showcased in the different looks, these stains can easily double as a long-lasting blush. The blendable formula allows for a seamless application, giving your cheeks a radiant flush that lasts all day.

  • Contour: Yes, you read that right! Opt for a darker shade and use it to contour your face lightly. Just apply it to the hollows of your cheeks, along your jawline, and your temples, then blend well for a softly sculpted look.

  • Temporary Tint: Want to experiment with a different hair color without the commitment? Apply a small amount of the stain to a strand of hair and let it dry. It’s a fun and easy way to play with hues and add a pop of color to your style.

So, if you thought Colorlab’s lip and cheek stains were merely for your pout, think again! Their multi-use functionality makes them an essential part of any beauty arsenal, offering endless possibilities for creative expression. Time to let your imagination run wild!

Shop our lip and cheek stains:

Ready to elevate your beauty game? From achieving a natural daytime look to dazzling on a night out, Colorlab’s lip and cheek stains are the versatile must-haves you’ve been searching for. They’re long-lasting, blendable, and perfect for creating a range of looks that suit any occasion. So why wait? Shop now and unleash your creativity! 🛒💄✨

Open post

6 Dramatic Graphic Liner Looks to Try Today

Graphic eyeliner is taking over Instagram feeds and runways as the boldest makeup trend. From sharp cat eyes to geometric works of art, graphic liner makes a dramatic statement. Typically created with liquid or gel formulas, this look can also be achieved with pressed cake eyeliner for an intense color payoff.

In this blog post, we’ll explore how Colorlab’s pressed cake eyeliner pans can be used to create show-stopping graphic eyeliner looks. With rich, buildable color and a smudge-resistant finish, these eyeliner compacts are the perfect tool for executing precise lines, shapes, and designs. We’ll go over tips for effectively using pressed cake liners and provide inspiration for recreating the most striking graphic eye looks.

Whether you’re an aspiring makeup artist or a beauty enthusiast, graphic liner elevates any eye look. The versatility of Colorlab’s pressed cake eyeliner allows you to experiment with stunning shapes, vivid colors, and bold designs. Follow along as we detail how to master graphic eyeliner artistry with these professional-quality cosmetic pans. With the right techniques, you can customize glamorous liner looks that make a lasting impression!

Dramatic Graphic Eye Looks to Recreate

The creative possibilities are endless when it comes to using pressed cake eyeliner to achieve graphic eye looks. Here are some bold liner ideas to recreate with Colorlab’s pans:

Floating Winged Liner

The floating winged liner look makes a sultry statement. To achieve this, use pressed cake eyeliner to draw a wing shape that is disconnected from your lash line. Position the wing floating in your crease area and extend it upward and outward. Leave a gap between the floating wing and your lash line for an avant-garde detached effect. Focus the liner on your crease and avoid the lower lash line to keep the look airy.

Colorblock Cat Eye

Try a color block liner look for a modern twist on the classic cat eye. Use two complementary shades of pressed cake eyeliner to trace a cat eye along your lash line and crease. Fill in one half of the cat eye in a bold color and the other half with a contrasting hue. The split color eyeliner provides visual interest for a standout shape. To enhance the duo-chrome effect, make one shade metallic or glitter.

Cut Crease Graphic Liner

The cut crease is another popular graphic eyeliner technique. Use a pressed cake liner to trace right along your natural eye crease, extending slightly above and below the fold. Create a rounded or winged shape following the contours of your actual crease. Intensify the shape by building up the liner color to make the graphic lines pop. Keep the rest of the lid bare for maximum contrast.

Negative Space Liner

Negative space liner makes use of the contrast between bare skin and graphic shapes. First, apply pressed cake liner to trace a bold shape along your lash line or crease. Then leave the centers blank to create negative space around the graphic outline. The focal point becomes the bare skin within the lined shape. Try chevrons, triangles, hearts or abstract shapes for bold graphic impact.

Geometric Angles

Geometric eyeliner looks are all about sharp lines, points and angles. Use pressed cake liner to trace shapes like triangles, rectangles, diamonds and chevrons across your lids. You can place shapes along the lash line, floating in space, or crossing over each other. For extra dimension, make the shapes different sizes and overlap them. Keep the lines clean and confident for the full geometric effect.

Double Liner

Amp up the drama by layering two graphic eyeliner looks. First, apply one bold graphic shape with pressed cake liner, like a cut crease or wing. Then go over it with a second liner look, either on top or below. For example, trace lower lash lines with neon liners under a floating crease wing. The possibilities are endless for liner combinations!

The options are limitless for the graphic looks you can create! Get creative with combining colors, shapes, angles, and overlays to invent your signature liner look.

The Benefits of Using Pressed Cake Eyeliner for Graphic Looks

Pressed cake eyeliner offers many advantages for creating graphic eyeliner art. Here are some of the top benefits of using Colorlab’s pressed cake pans:

  • Intense Pigment – The pressed cake formula provides rich, concentrated color that applies opaque in a single swipe. This intense payoff allows you to create bold graphic shapes.

  • Buildable Coverage – While the pigment is highly saturated, you can also build up the pressed cake eyeliner to different levels of opacity. This makes it easy to create dimensional liner looks.

  • Long Lasting – Once applied and set, pressed cake eyeliner is incredibly long-wearing and transfer-resistant. Graphic lines and shapes will last all day without smudging or fading.

  • Smudge Resistant – The creamy formula sets to a transfer-proof finish that won’t budge or smudge, even on the oilier lids.

  • Precise Lines – The cake can be sharpened for ultra-fine points and edges, perfect for executing the intricate details of graphic looks.

  • Blends Easily – Despite its budge-proof set, the formula still blends out easily before drying for seamless smoothing.

  • Vibrant Color – Available in a range of vivid tones, these pans provide bright pops of color for an eye-catching graphic effect.

Tips for Creating Graphic Looks with Pressed Cake Eyeliner

Follow these tips to ensure smooth application and get the most out of your Colorlab pressed cake eyeliner:

  • Start with an eyeshadow primer to prep lids – This creates a smooth, crease-free base for graphic lines.

  • Use an angled eyeliner brush – The stiff, angled bristles give you better control for sharp lines.

  • Dip your brush into the pan and tap off excess – This prevents messy application.

  • Build up the color gradually in thin layers – Don’t drag the brush; use short strokes to build pigment.

  • Draw shapes in sections using small strokes – Resist pulling in one long line, which can slip.

  • Keep cotton swabs and makeup remover handy – For cleaning up any mistakes in application.

  • Set the liner with coordinating eyeshadow – This makes the graphic liner transfer-proof.

  • Take your time – Rushing through the application can lead to uneven lines.

  • Relax your eyelids during application – This reduces natural creases in the eyelid skin.

  • Experiment and have fun! – Use different colors, shapes, and techniques to find your signature graphic look.

Graphic eyeliner opens up an endless world of creative expression. With Colorlab’s intensely pigmented pressed cake eyeliner pans, you have the perfect product to bring graphic looks to life. Vibrant colors, buildable opacity, and a smudge-resistant finish allow you to create crisp lines, bold shapes, and layered dimensional looks.

Whether you’re an artist looking to make a statement or a makeup newbie trying something new, don’t be afraid to let your imagination run wild with graphic liner. The versatility of pressed cake eyeliner empowers you to invent unique looks that show off your personal style. Trace delicate faux lashes one day and geometric colorblocking the next. With the right tools and techniques, you can customize graphic eyeliner artistry to your heart’s desire.

The next time you do your makeup, set aside a little extra time to experiment with graphic shapes and dazzling colors. Draw inspiration from your favorite makeup artists and mood boards, but don’t be afraid to put your own spin on liner looks. With pressed cake eyeliner’s long wear and intense pigment, you can create magazine-worthy liner art that makes a lasting impact. So grab your angled brush, choose a palette of pans in your favorite shades, and transform your eyes into a bold work of art!

Open post

Nostalgia in Vogue: Achieving the 90s Supermodel Chic Look

Get ready to step into a time machine as we whisk you back to an era of high fashion, bold makeup, and supermodels ruling the runway. Welcome to the 90s, a decade where the supermodel chic look reigned supreme and continues to influence modern beauty trends.

The 90s were an iconic time in fashion history; the supermodels of the era—think Cindy Crawford, Naomi Campbell, and Linda Evangelista—were household names. They set the style standards high with their sultry smoky eyes, perfectly contoured cheeks, and pouty, berry-stained lips. Today, these signature looks are not only resurfacing but being embraced by celebrities, influencers, and beauty enthusiasts alike.

In this post, we’ll explore the revival of the 90s supermodel chic look, break it down to its core elements, and guide you on how to recreate this iconic style with Colorlab Private Label products. So, prepare to channel your inner 90s supermodel.

https://www.instagram.com/p/Ct9_EkapjGB/

The Resurgence of the 90s Supermodel Chic Look

As with many fashion trends, what once was old is new again. The resurgence of the 90s can be seen in the beauty and fashion world—from cargo pants to grungey eyeliner. And among these trends is 90’s supermodel chic. But why is this particular style making such a significant comeback?

The 90s supermodel chic look is synonymous with a sense of nostalgia that’s currently sweeping through our culture. As we find ourselves in an increasingly digital era, many are seeking solace in the bold yet classic aesthetics of the past. This longing for simpler times has brought the 90s style back into the spotlight.

In addition, today’s beauty enthusiasts appreciate the timeless quality of this look. It combines the daring elements of high fashion with a universal appeal. The smoky eyes add an air of mystery, the rosy cheeks exude a youthful glow, and the berry lips make a bold yet elegant statement.

Notable celebrities and influencers have also played a pivotal role in reviving this trend. Figures like Gigi Hadid, Emily Ratajkowski, and Kendall Jenner often channel 90s supermodel vibes, rocking smoky eyes, full brows, and matte lips on red carpets and social media alike.

https://www.instagram.com/p/CSQSwcTMjLb/

Moreover, the beauty industry’s shift towards inclusivity and diversity echoes the 90s supermodel era— a time when supermodels of various ethnic backgrounds came to prominence. This diversity allows the 90s supermodel chic look to be adopted and adapted by everyone, making it a trend that celebrates individuality and self-expression.

Stay with us as we dive into the defining characteristics of this iconic look, and learn how you can bring the 90s supermodel chic into your next outing.

Defining the 90s Supermodel Chic Look

The 90s supermodel chic look was all about bold and dramatic features, balanced by a sense of natural elegance. Let’s dissect the core elements that define this enduring look.

Bold Eyes: The eyes are the central focus of the 90s supermodel look. Models often sported smoky eyes with layers of eyeshadow, giving a sultry and mysterious appeal. Our Cat Walk, Mirage, Jet, and Baby Doll eyeshadows are perfect for recreating this look. These shades can be blended together to create depth and definition, perfect for making a captivating statement.

Rosy Cheeks: The 90s supermodel chic look often featured cheeks with a soft, rosy glow. This subtle blush mimics the natural flush of your skin, giving you a youthful and healthy appearance. Our Chai Blush and Camera Ready Blush can be used to achieve this, adding a warm touch to your complexion.

Berry Lips: To compliment the dramatic eyes and neutral cheeks, a deep berry lip was a popular choice in this retro look.. This color adds a hint of sophistication and glamour to the overall look. Our Berry Lip Liner and Flower Power Lipstick will help you create the perfect 90s supermodel pout.

However, the true beauty of the 90s supermodel chic look lies in its versatility. While these are the fundamental elements, it’s a style that can be customized to suit individual preferences and different skin tones, making it a go-to look for many beauty lovers today.

https://www.instagram.com/p/CM2f2EdDazP/

Step-by-Step Guide: Achieving the 90s Supermodel Chic Look

Before we dive into the application process, let’s start with a well-prepared canvas. Cleanse, moisturize, and prime your skin to ensure a smooth application and long-lasting makeup. Now, let’s start painting the picture of a 90s supermodel.

  1. Eyes: Begin by applying a base eyeshadow (like our Baby Doll) all over your lids to create a clean slate. Next, blend a darker shade (like Jet or Cat Walk) into the crease of your eyelid for added depth. Use an even darker shadow (like Mirage) at the outer corner of the eye and along the lash line for a sultry smoky effect. Remember, blending is key to achieving a seamless look.

  2. Cheeks: The 90s look is all about a natural, rosy flush. Start with a lighter blush (such as Chai Blush) on the apples of your cheeks for a soft touch of color. Then, apply a deeper blush (like our Camera Ready Blush) slightly below the cheekbones for a subtle, sun-kissed contour.

  3. Lips: Start by lining your lips with a deep, berry-toned liner (our Berry Lip Liner is a perfect example) to define the shape and prevent your lipstick from bleeding. Then, fill in your lips with a rich, complementary lipstick (like our Flower Power Lipstick) for that quintessential 90s pout.

These steps offer a general guide to achieving the 90s supermodel chic look with our Colorlab Private Label products. However, the beauty of makeup lies in its ability to be personalized. Feel free to experiment with different colors and techniques that suit your style and complexion. Makeup is a form of self-expression, after all.

How to Adapt the 90s Supermodel Chic Look for Different Occasions

The beauty of the 90s supermodel chic look lies in its versatility. With a few simple tweaks, you can easily transition this look from day to night, casual to formal. Here are some tips on how to adapt the 90s supermodel chic look for different settings:

  1. Daytime Casual: You might want to keep things lighter for a daytime look. Use a softer touch with your eyeshadow application, blending in lighter shades for a subtle smoky effect. A hint of blush on the apples of your cheeks can give you a fresh-faced glow, and a swipe of a more neutral lipstick (try a lighter shade from our collection) will keep the look understated yet stylish.

  2. Office Ready: To adapt this look for the workplace, focus on defining your eyes with more neutral shades. Opt for a more muted blush and finish with a subdued, berry-toned lipstick to keep the look professional and polished.

  3. Night Out Glam: If you’re heading out for a night on the town, amp up the drama. Don’t hold back on your smoky eye – go bold with shades like Cat Walk and Jet. Add some extra blush for a rosy glow, and finish off the look with a dramatic berry lip to make a real statement.

  4. Formal Elegance: For a formal event, sophistication is key. Maintain the focus on your eyes, blending darker shadows for a smoky effect but with a touch of elegance. Use a lighter hand with your blush, and consider a bold yet refined lipstick.

Conclusion

The resurgence of the 90s supermodel chic look is more than just a nod to nostalgia. It’s a celebration of timeless elegance and self-expression. From the dramatic smoky eyes to the rosy cheeks and bold berry lips, this look transcends decades, bringing together elements of glamour, sophistication, and the everyday woman’s confidence.

Embracing this look not only provides an exciting variation to your beauty routine, but it also offers a unique opportunity to explore the transformative power of makeup. It’s a reminder that makeup is more than just a tool for enhancement—it’s a form of self-expression, a channel for creativity, and a way to embrace different facets of your personality.

With our step-by-step guide and adaptable suggestions, we hope you’re inspired to channel your inner 90s supermodel and experiment with this iconic look. Whether you’re dressing for a casual day out, a professional setting, a night on the town, or a formal event, Colorlab Private Label products can help you recreate and personalize the 90s supermodel chic look.

Scroll to top